DIY Louvers

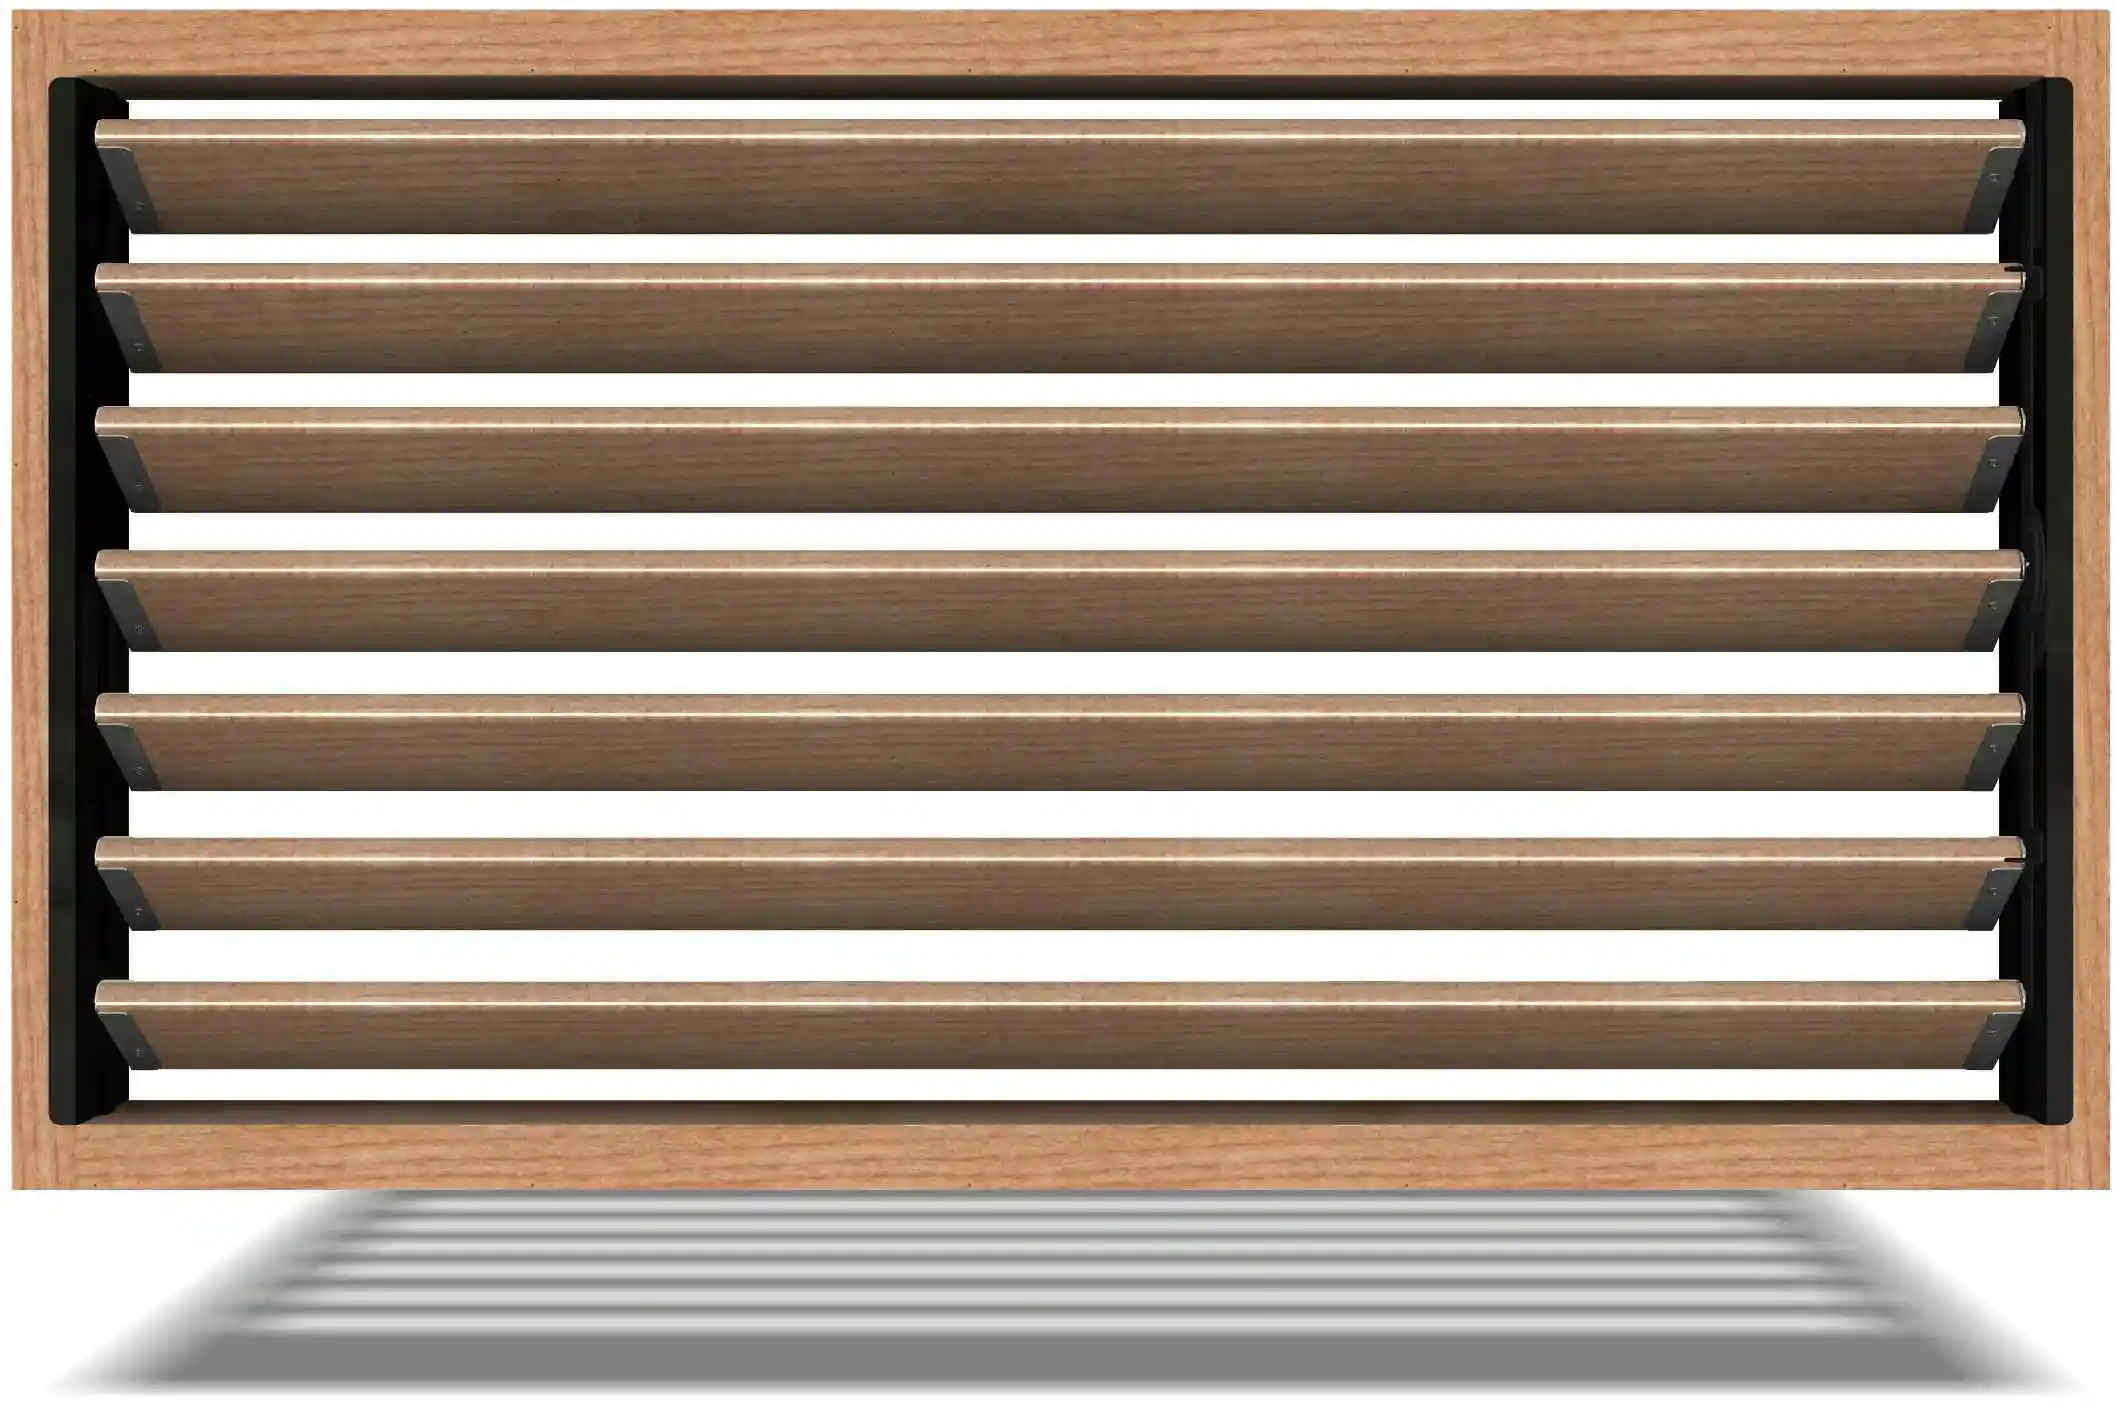
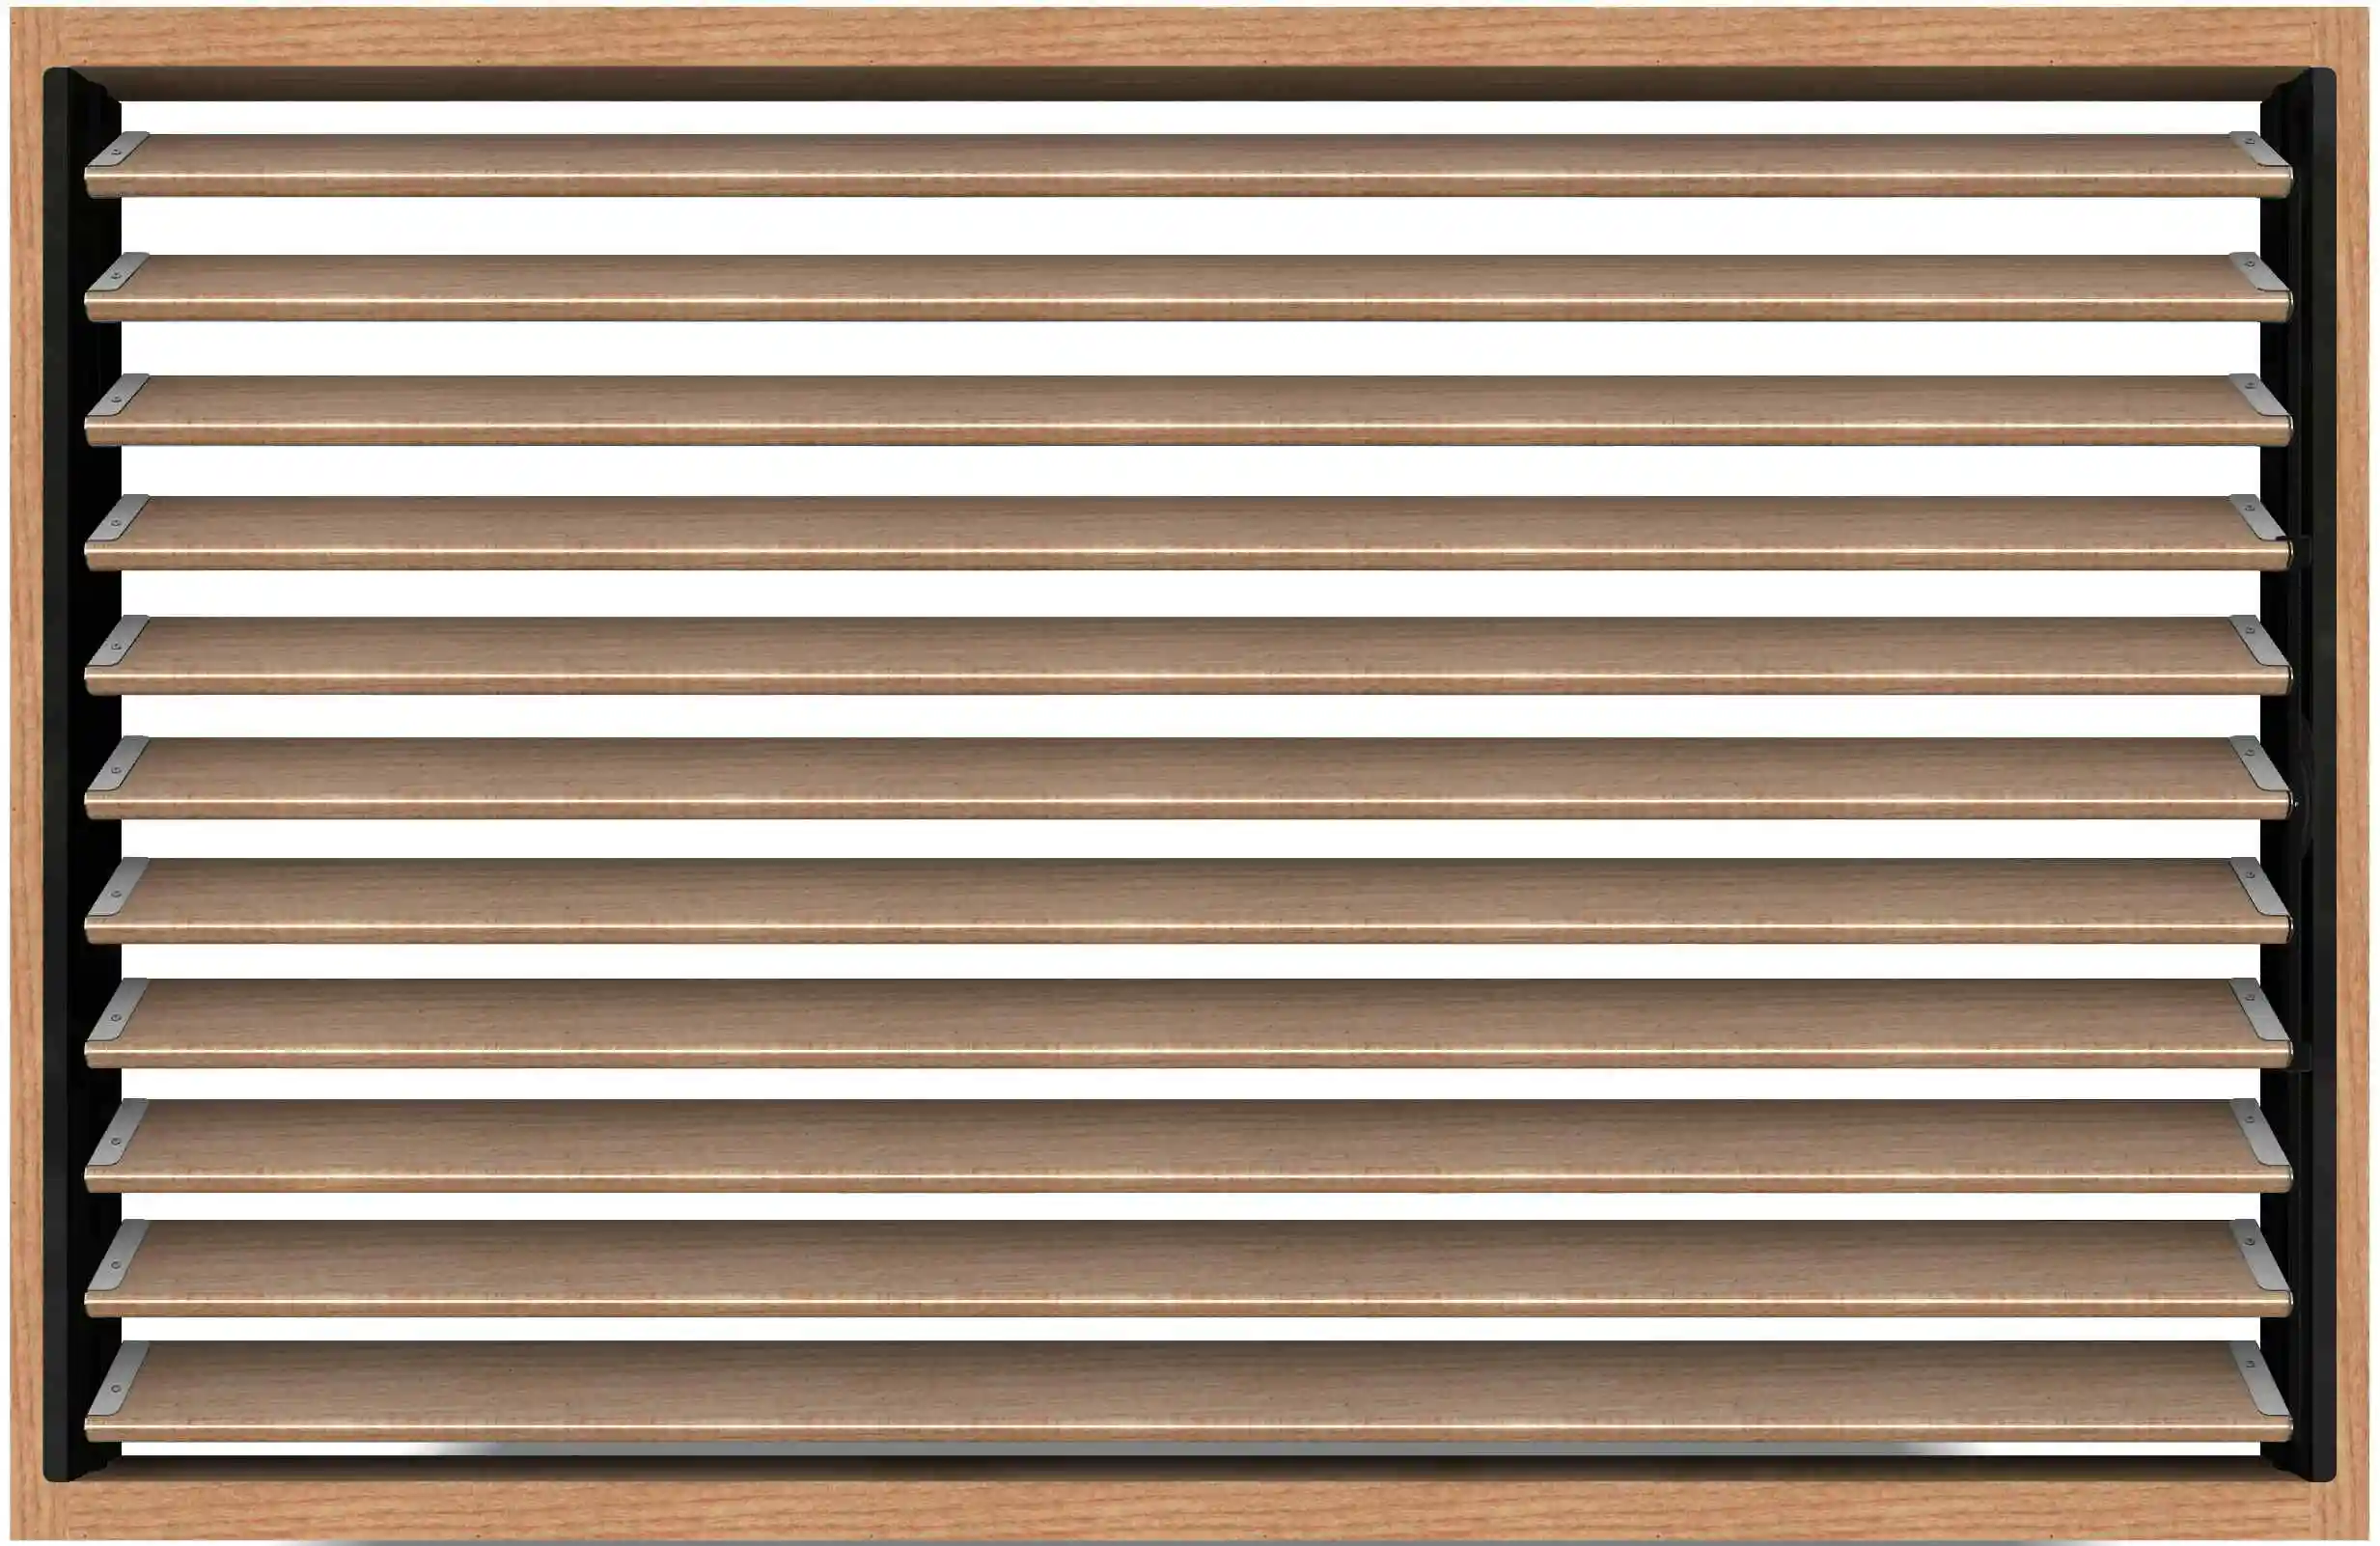
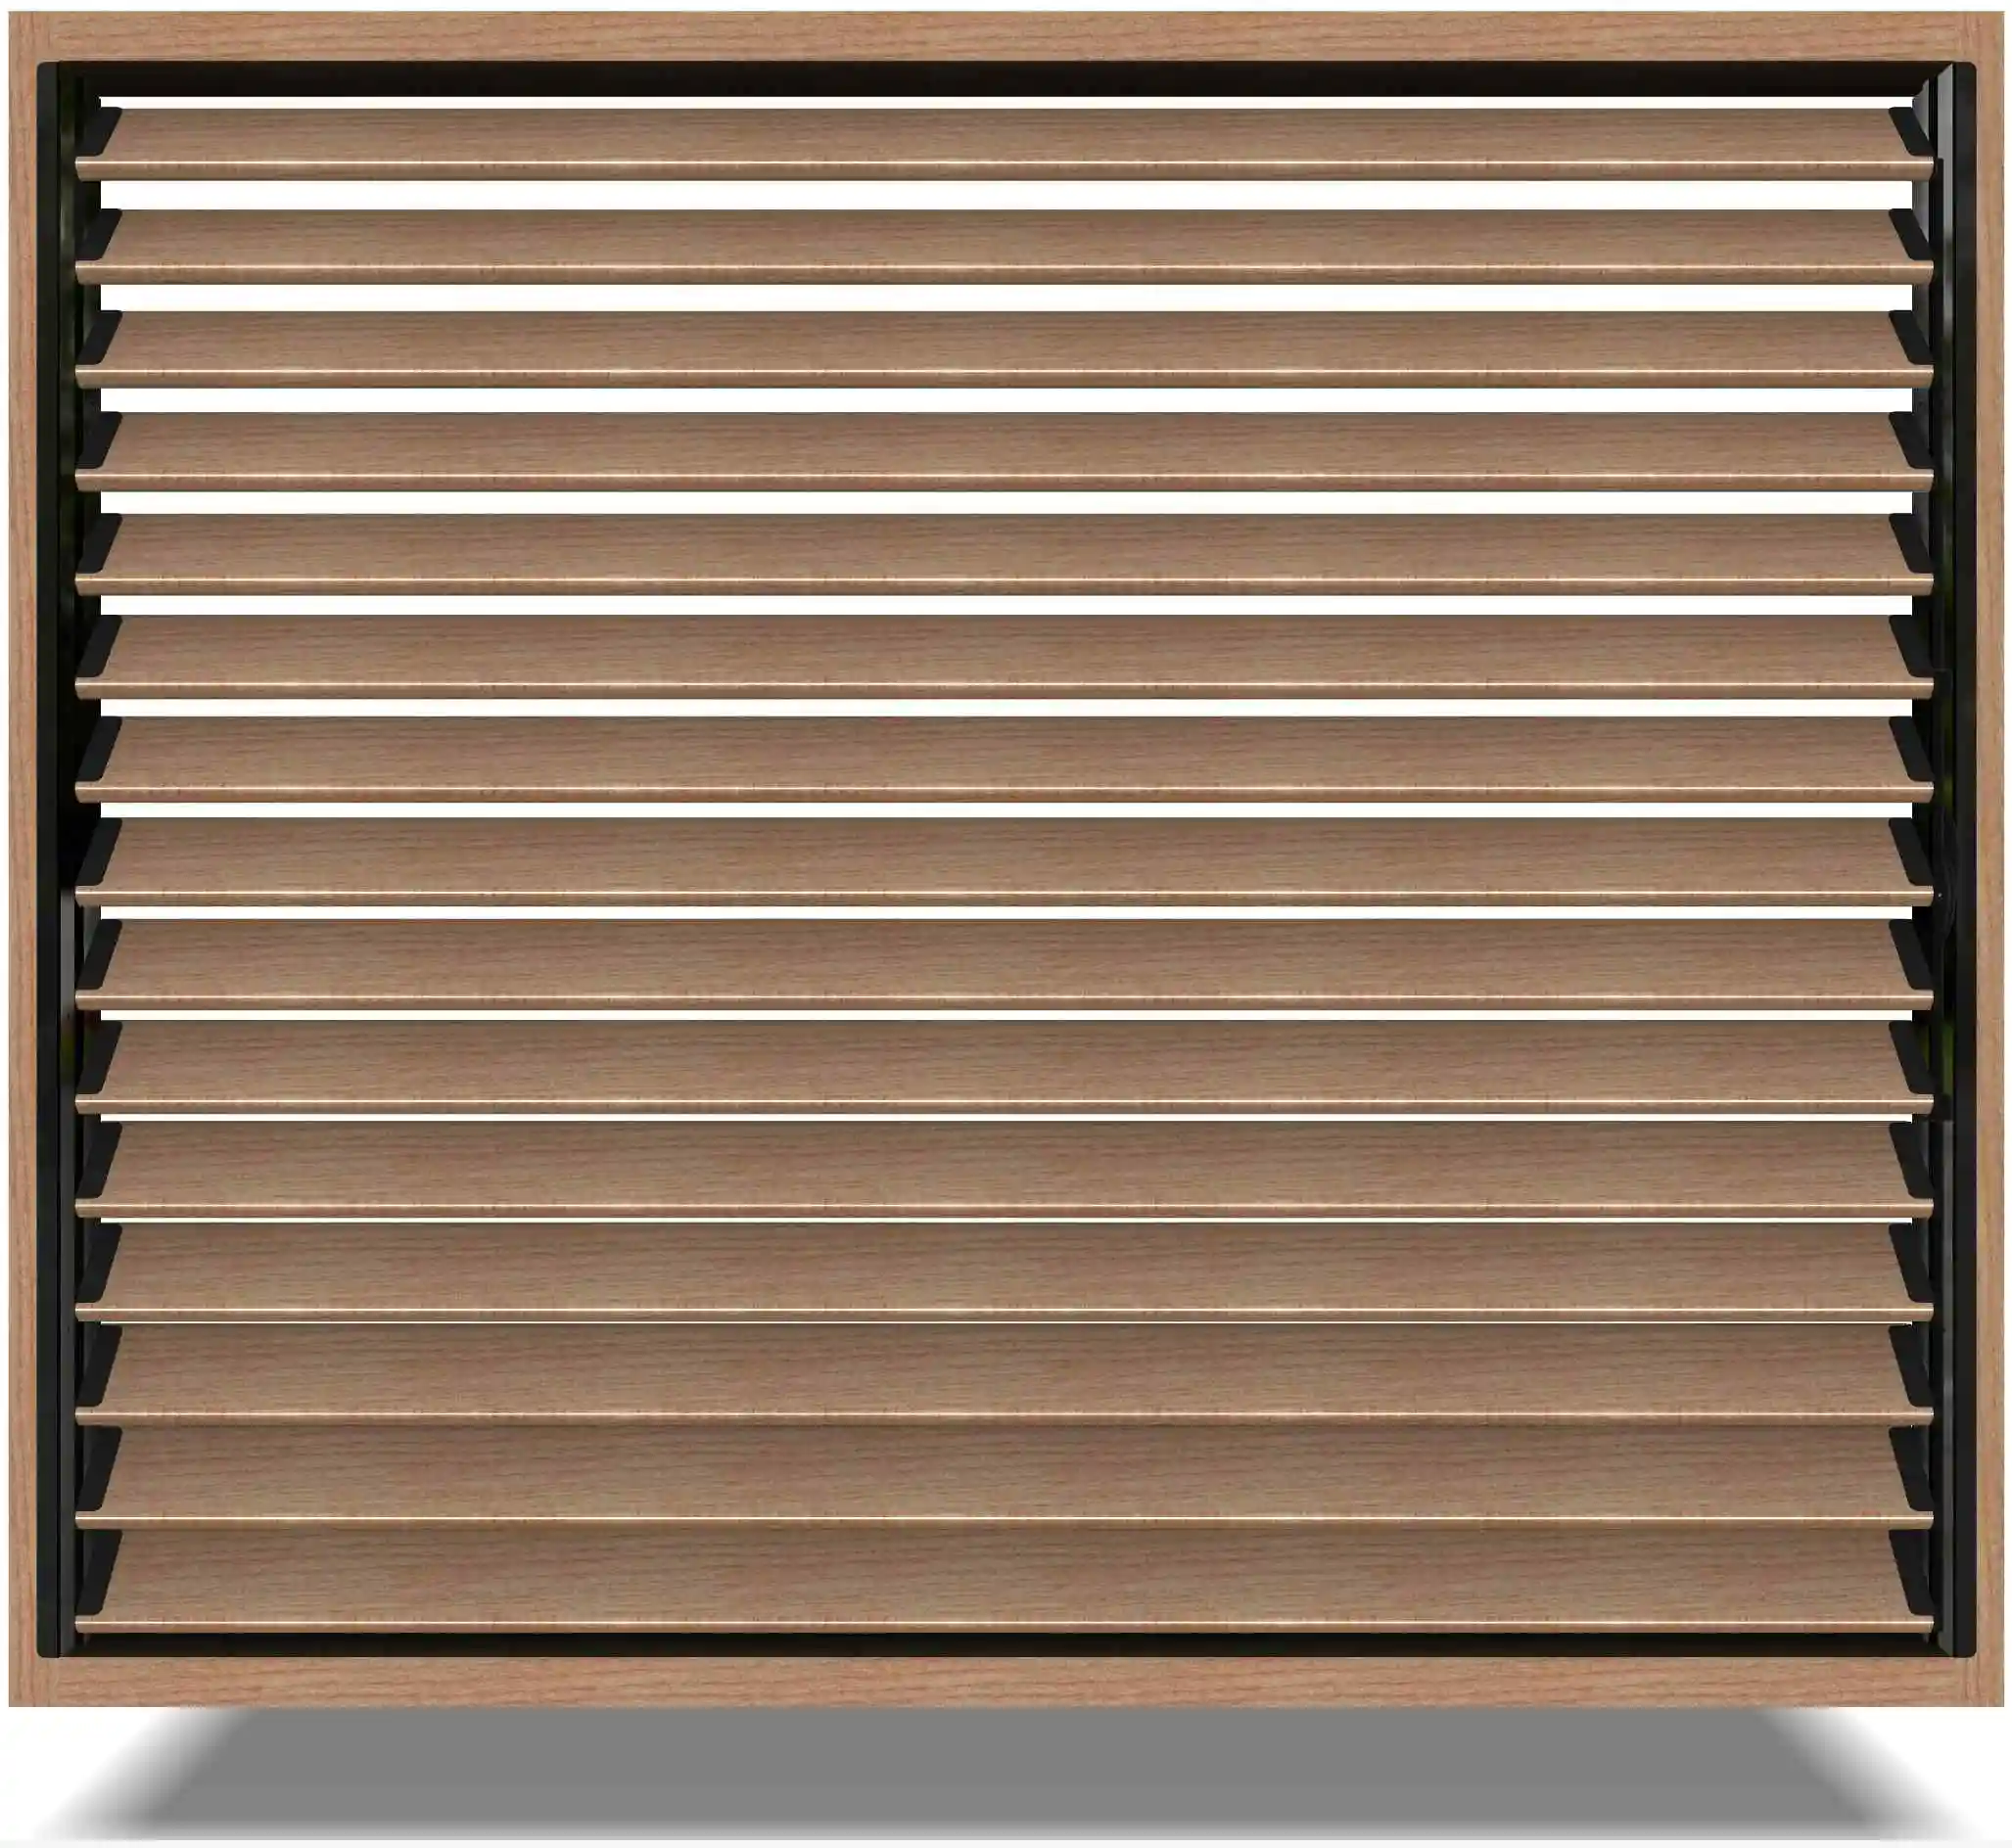
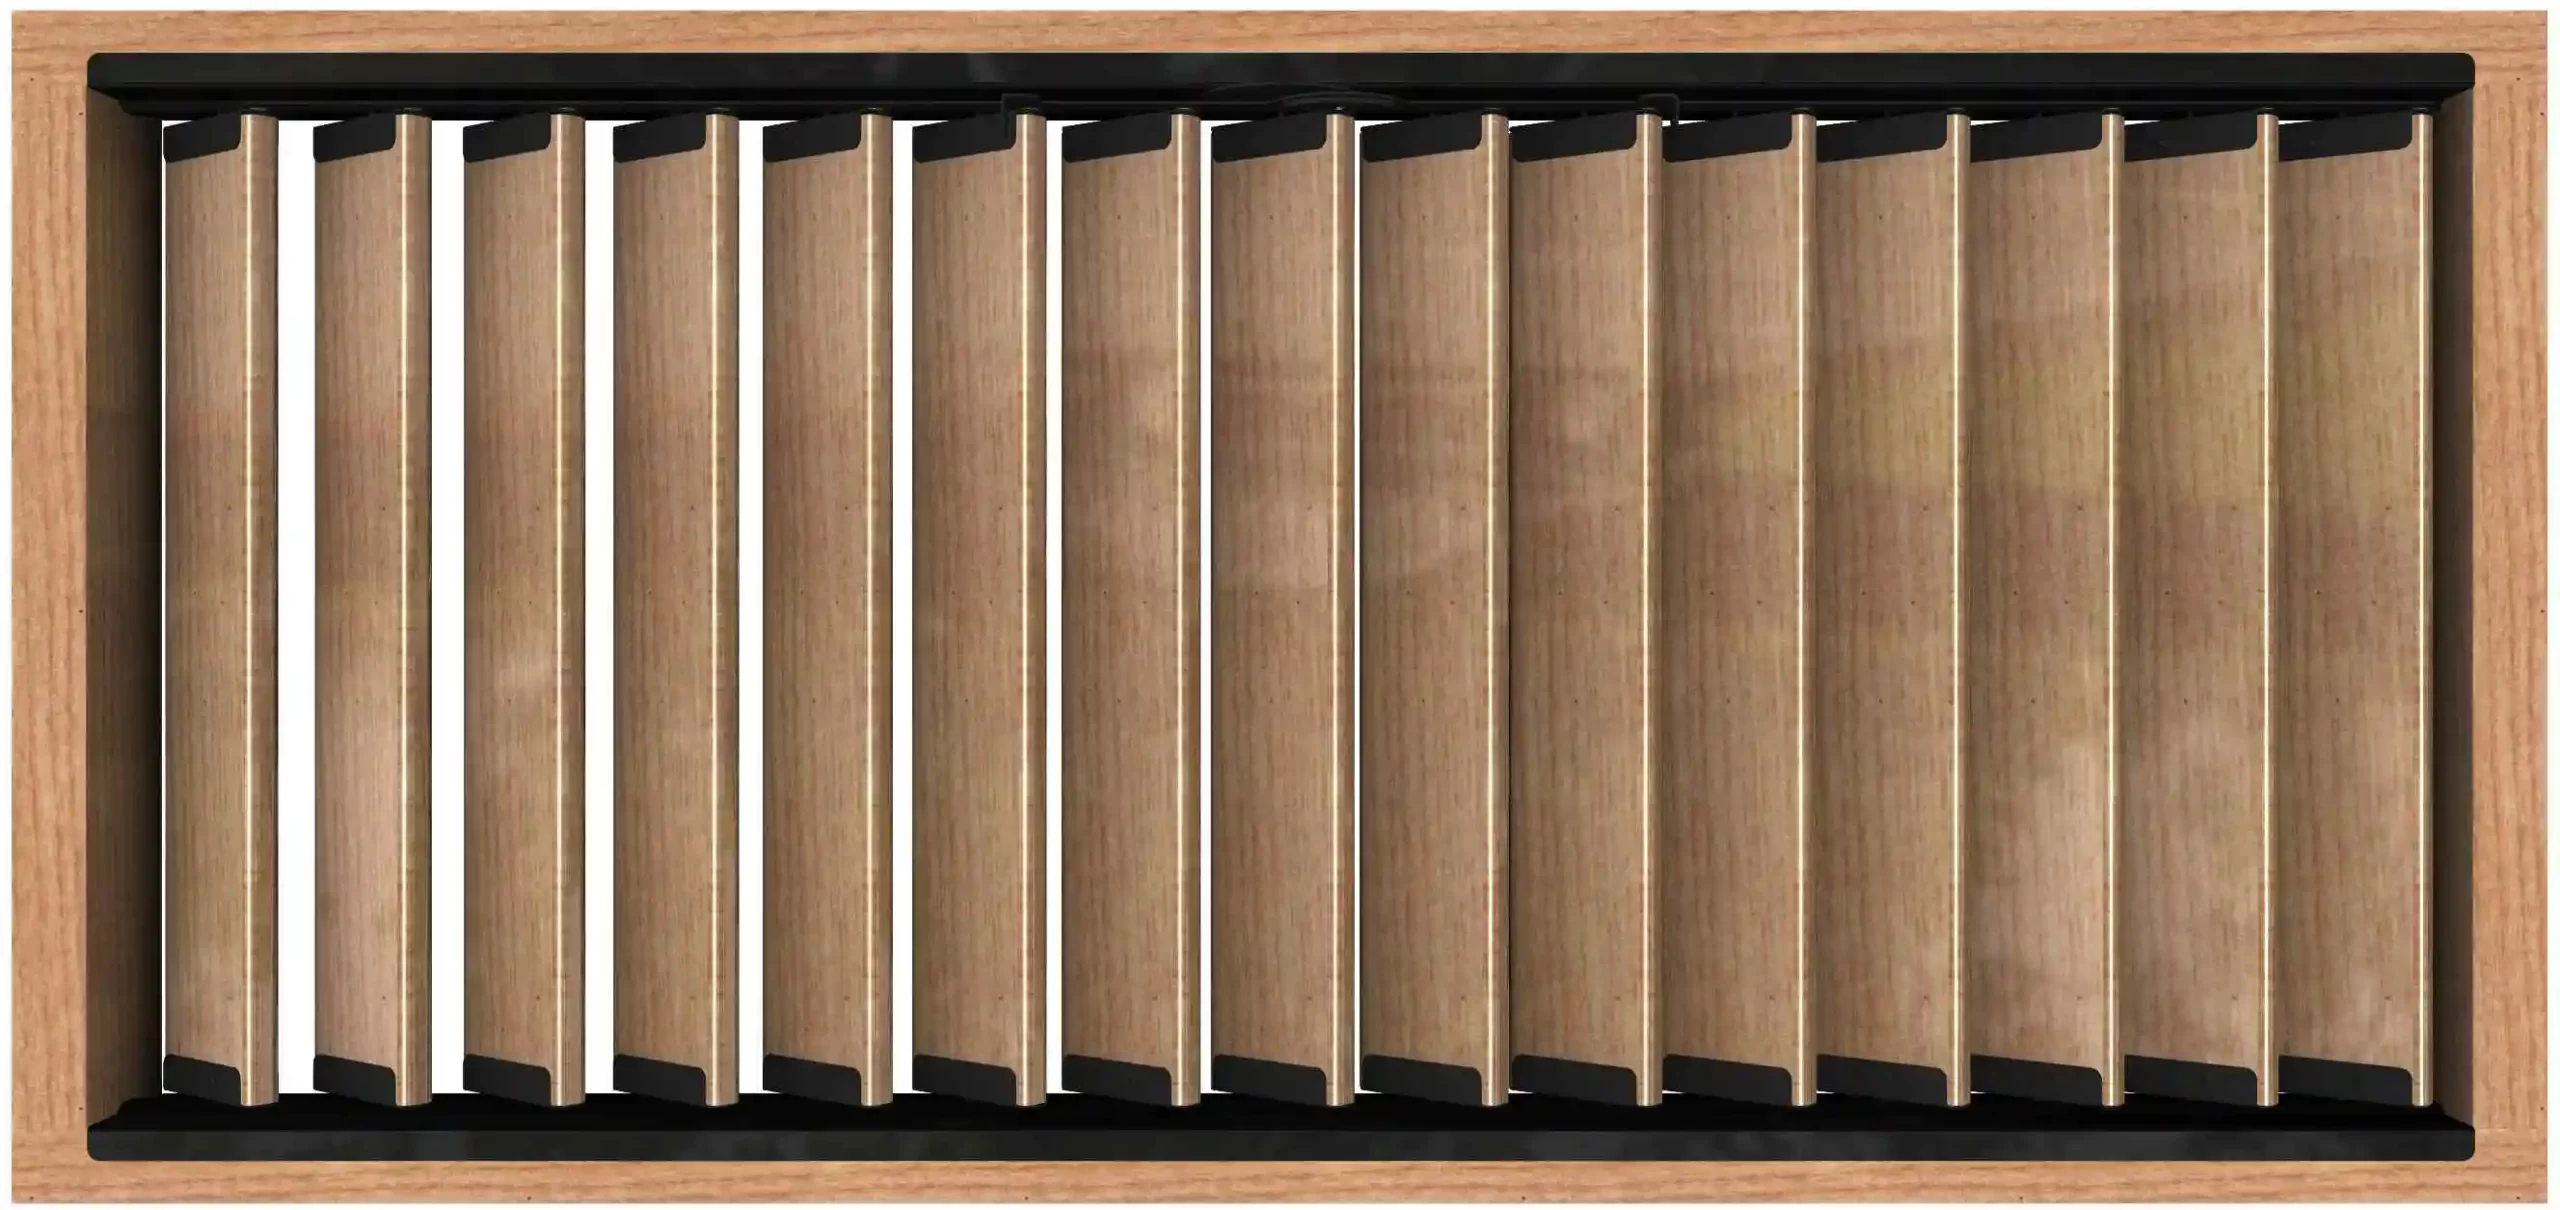
Transform your living space with our Decorative DIY Louvers. These innovative kits offer a practical solution for controlling ventilation while enhancing your interior design. The rotating louvers allow you to adjust airflow and create a customizable environment that suits your preferences. Whether you’re looking to improve air circulation, control lighting, or add a modern element to your decor, these DIY Louver bracket kits are the perfect choice. Easy to install and crafted with durability in mind, these kits are a must-have for DIY enthusiasts and homeowners alike. Upgrade your home with the Decorative Louvers and enjoy a more comfortable and stylish living space.

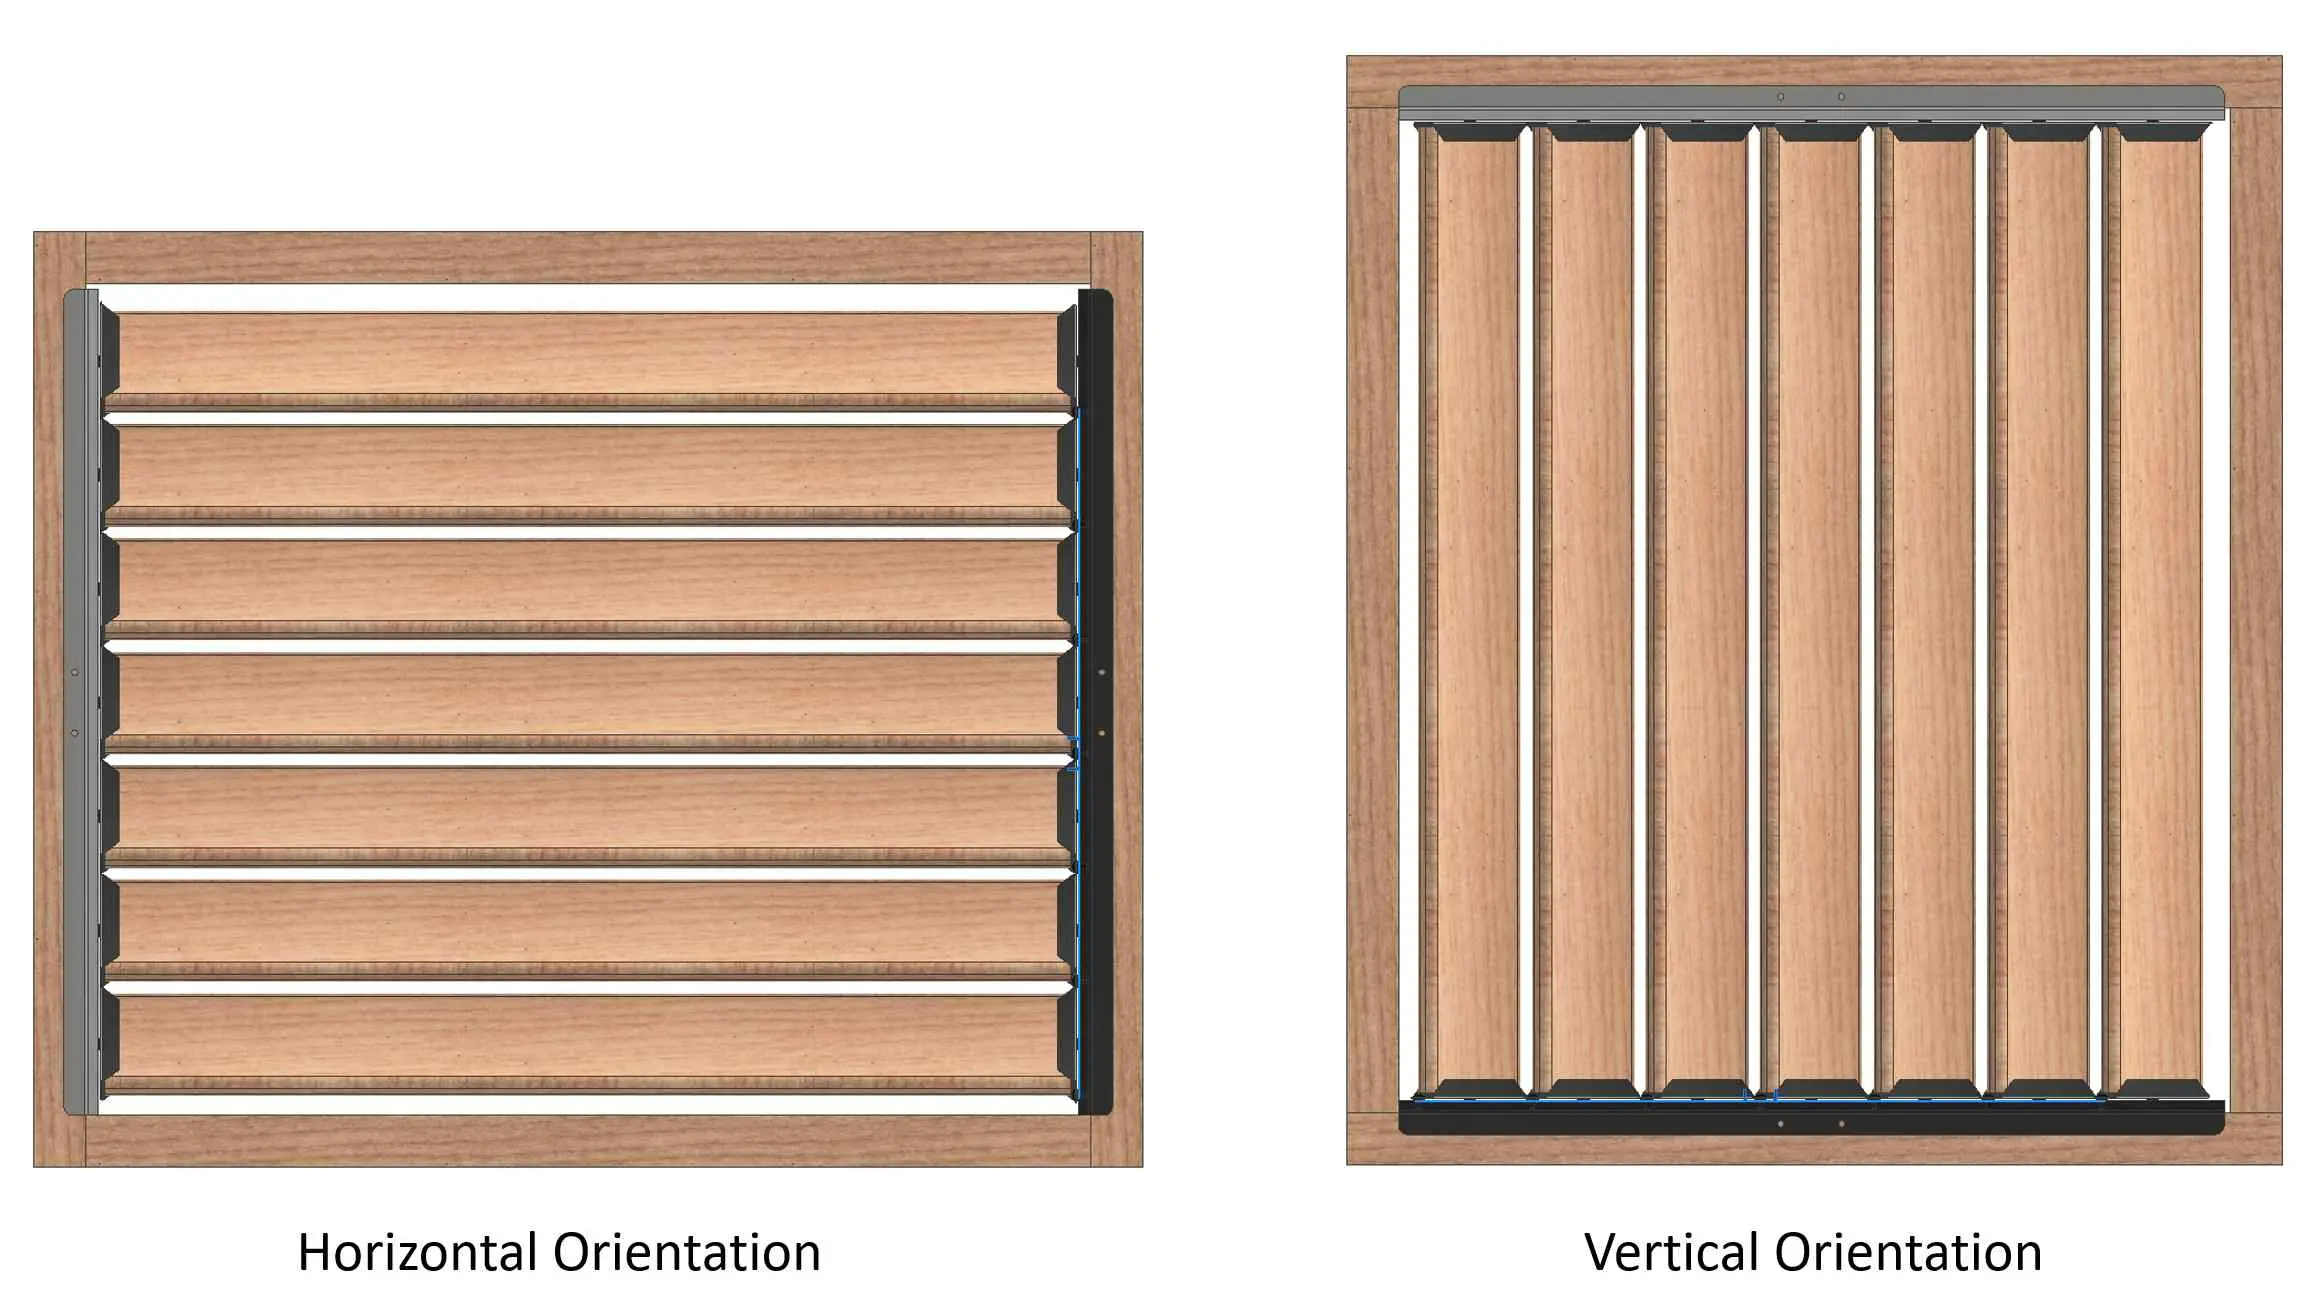
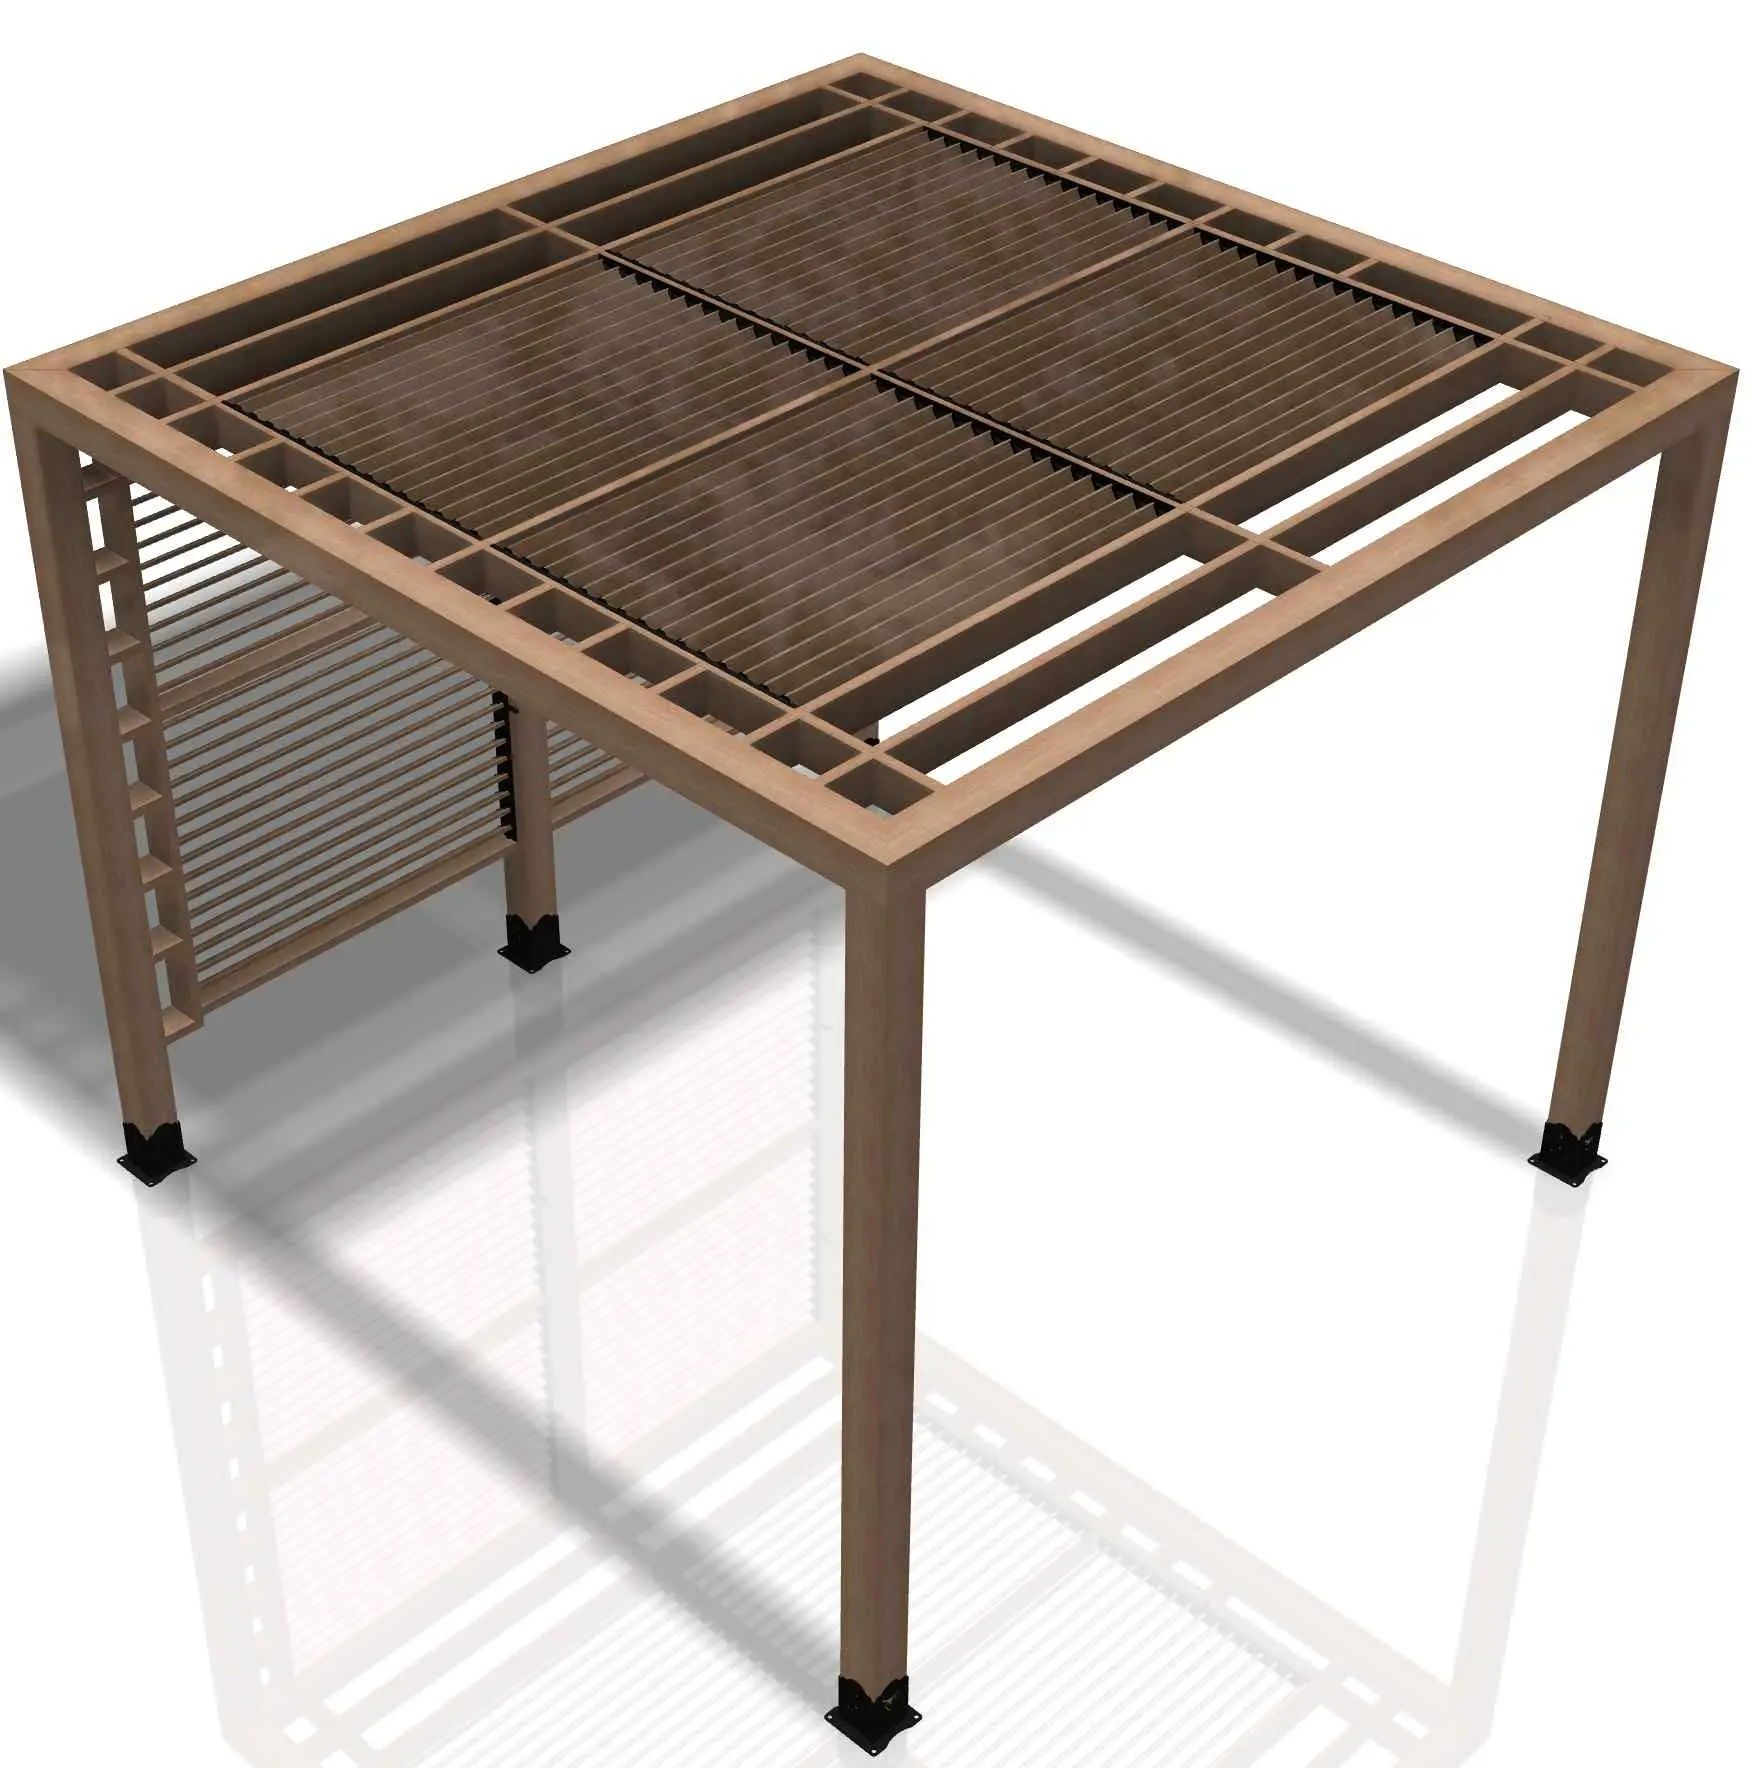
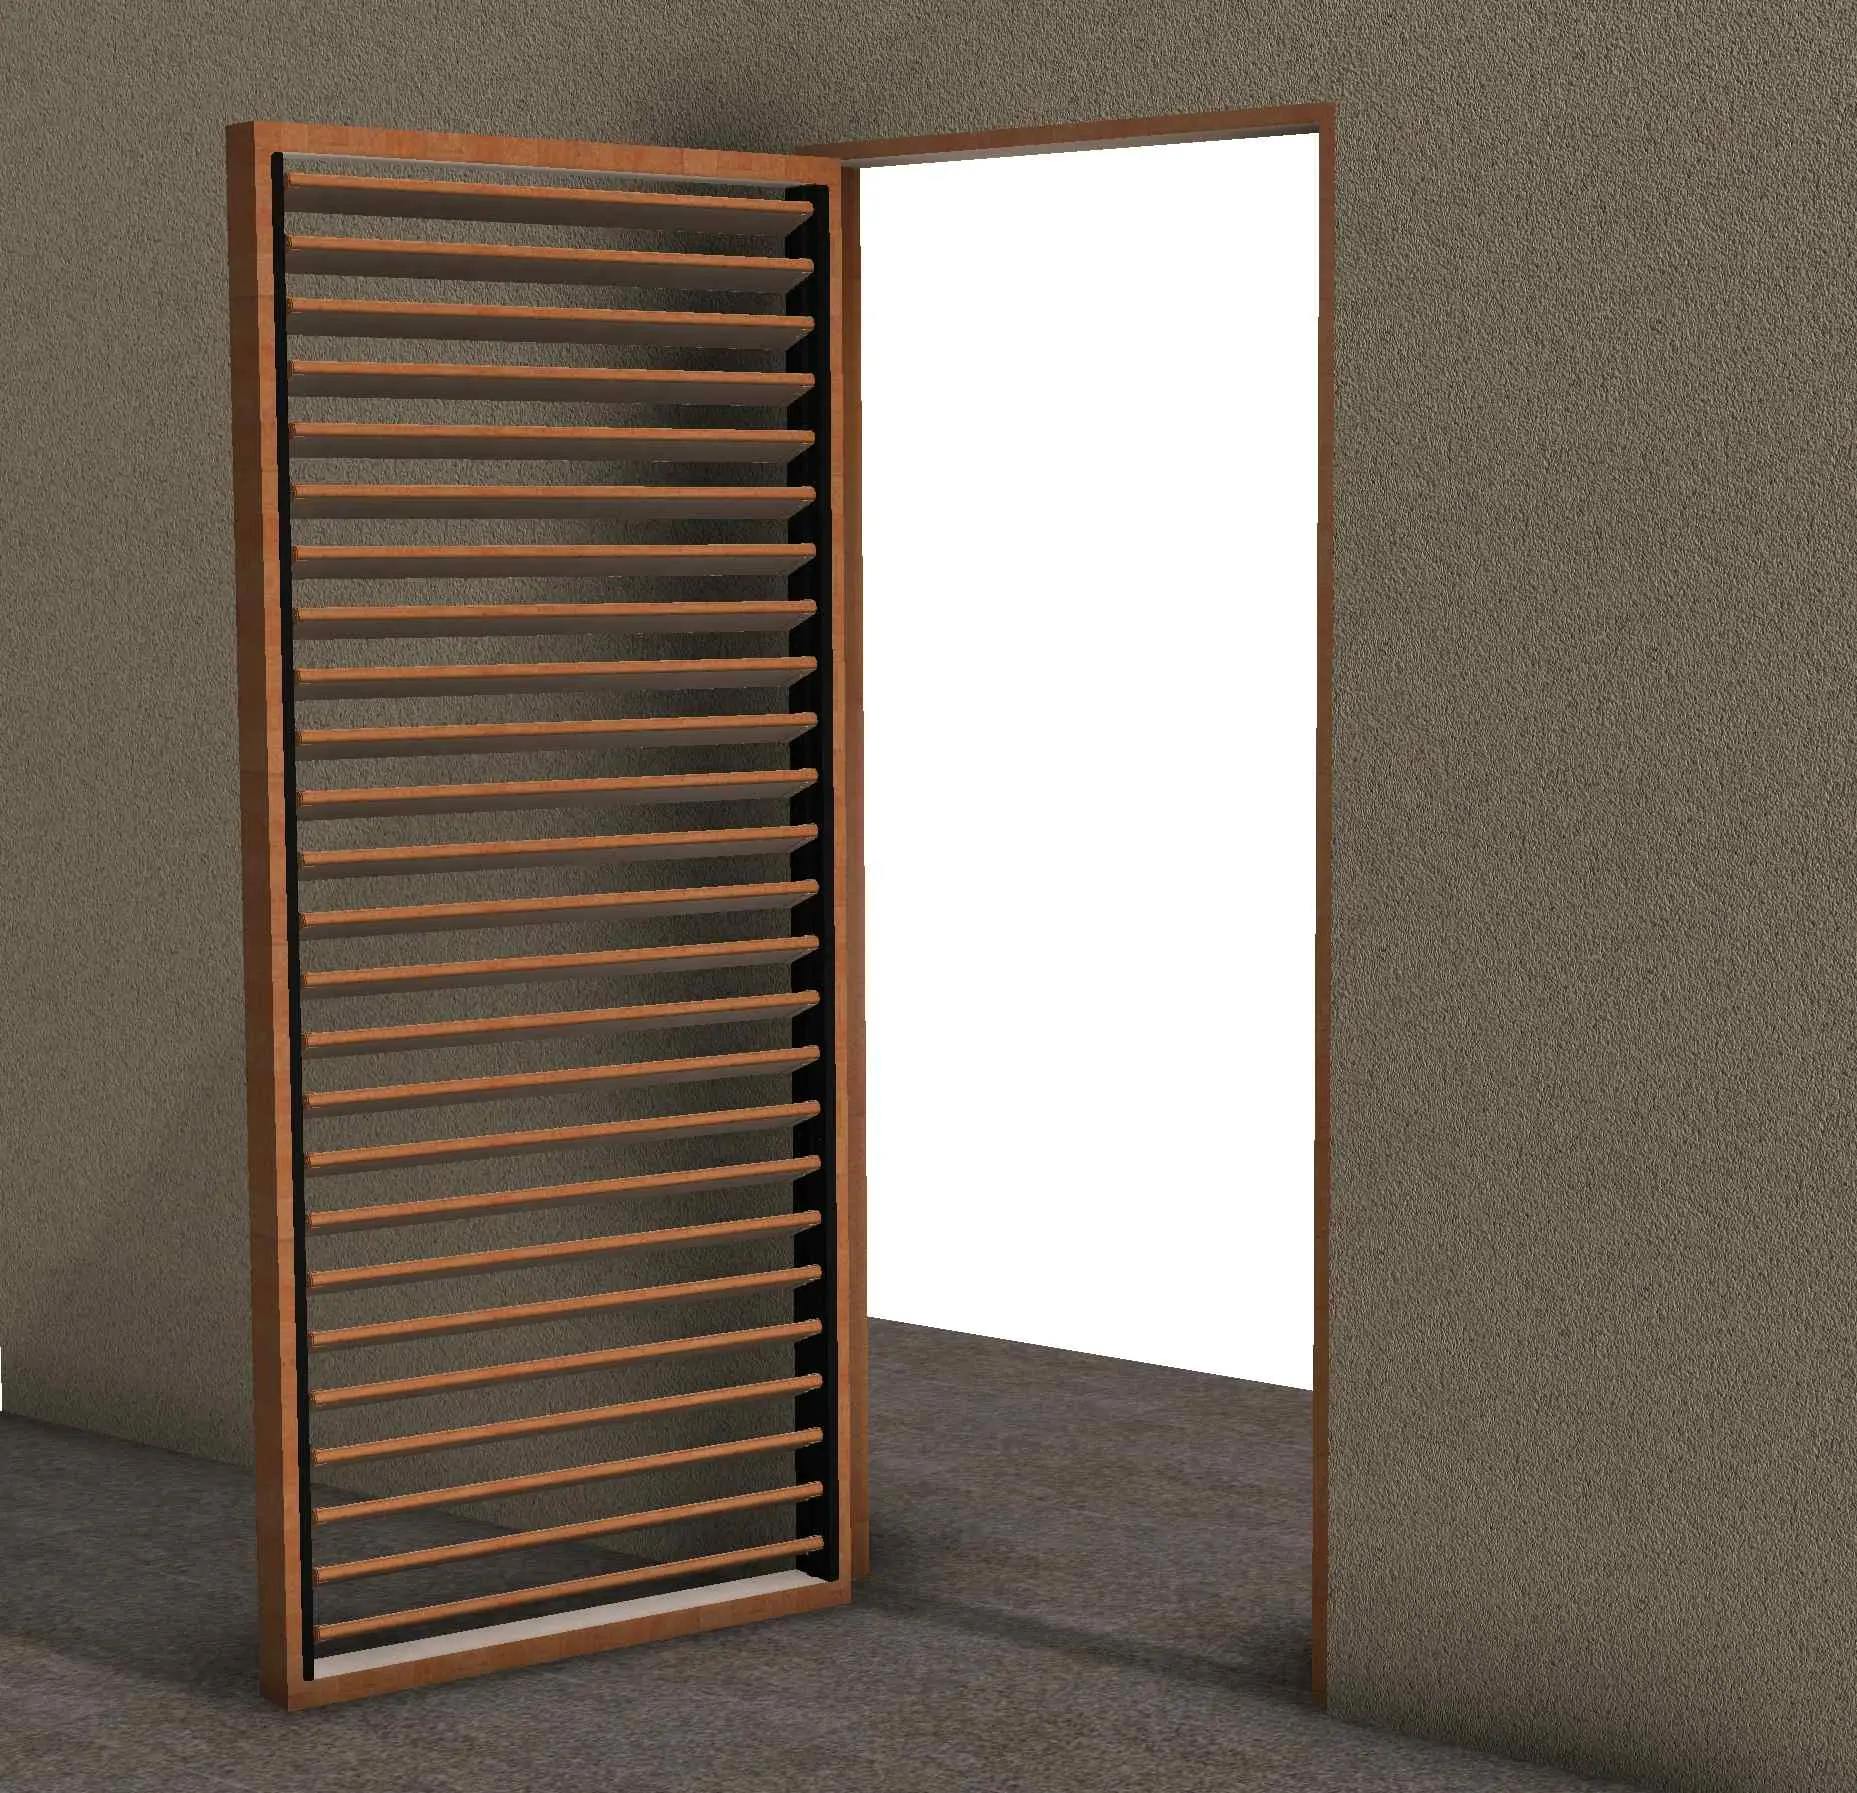
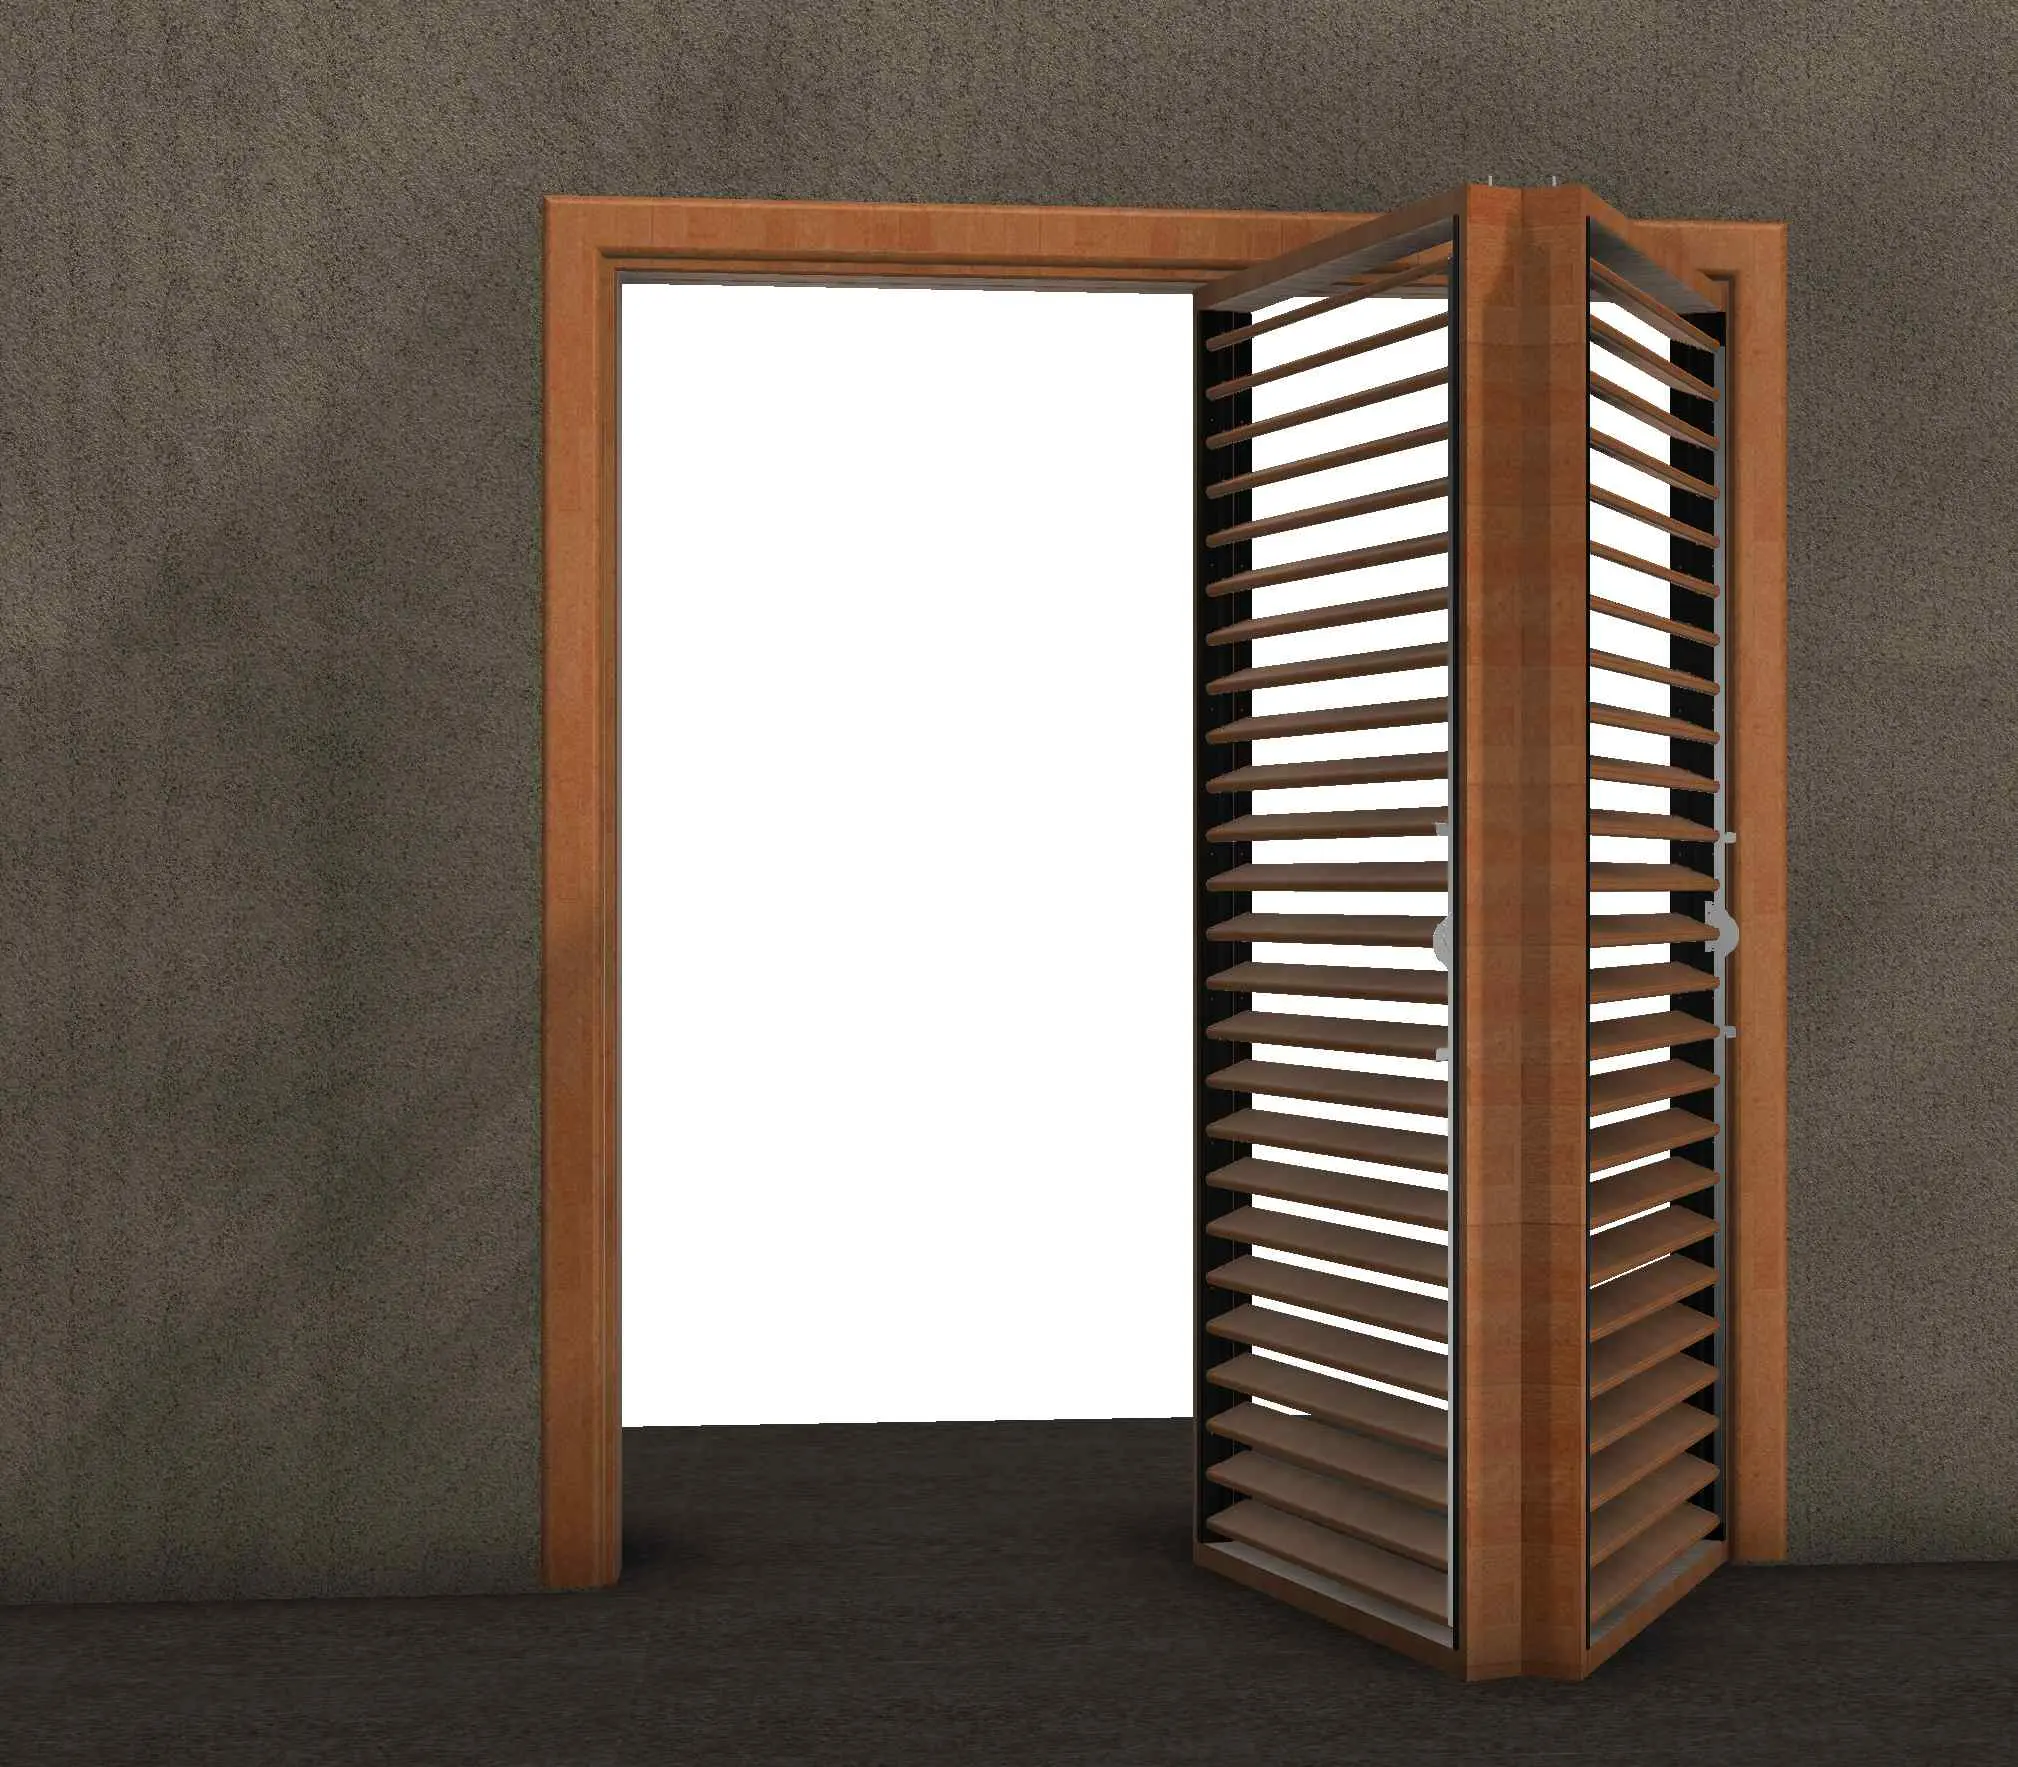
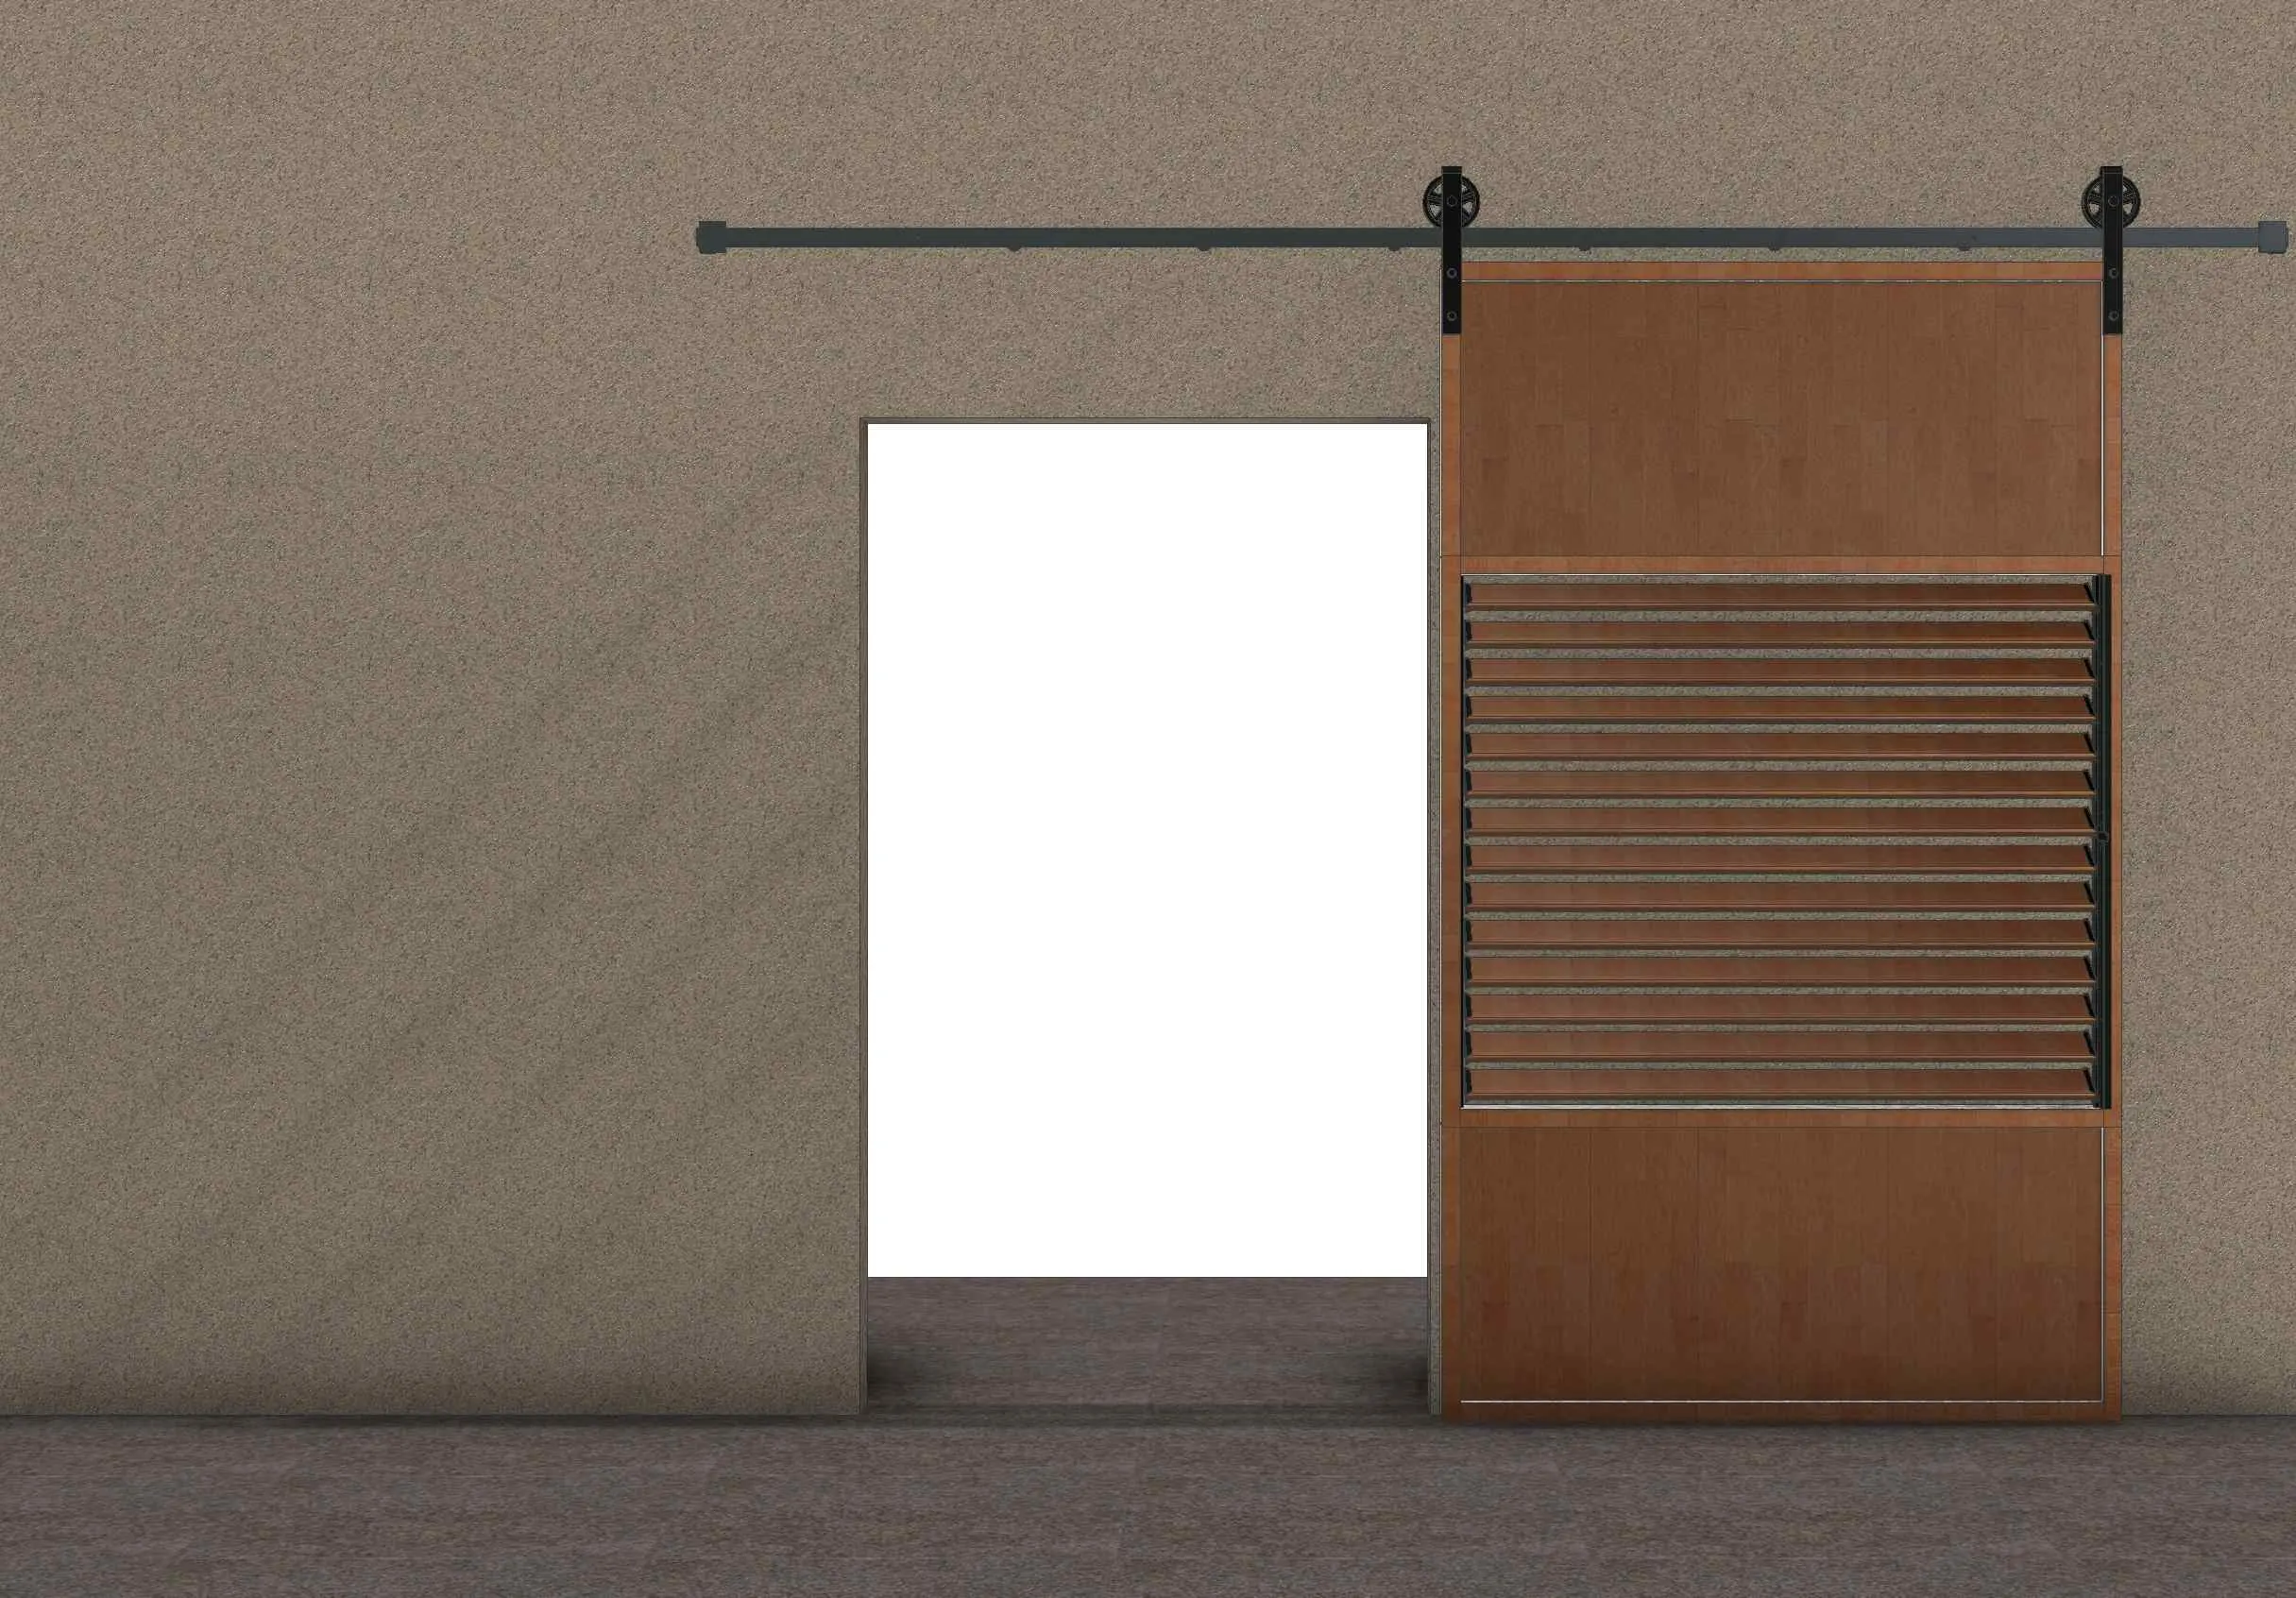
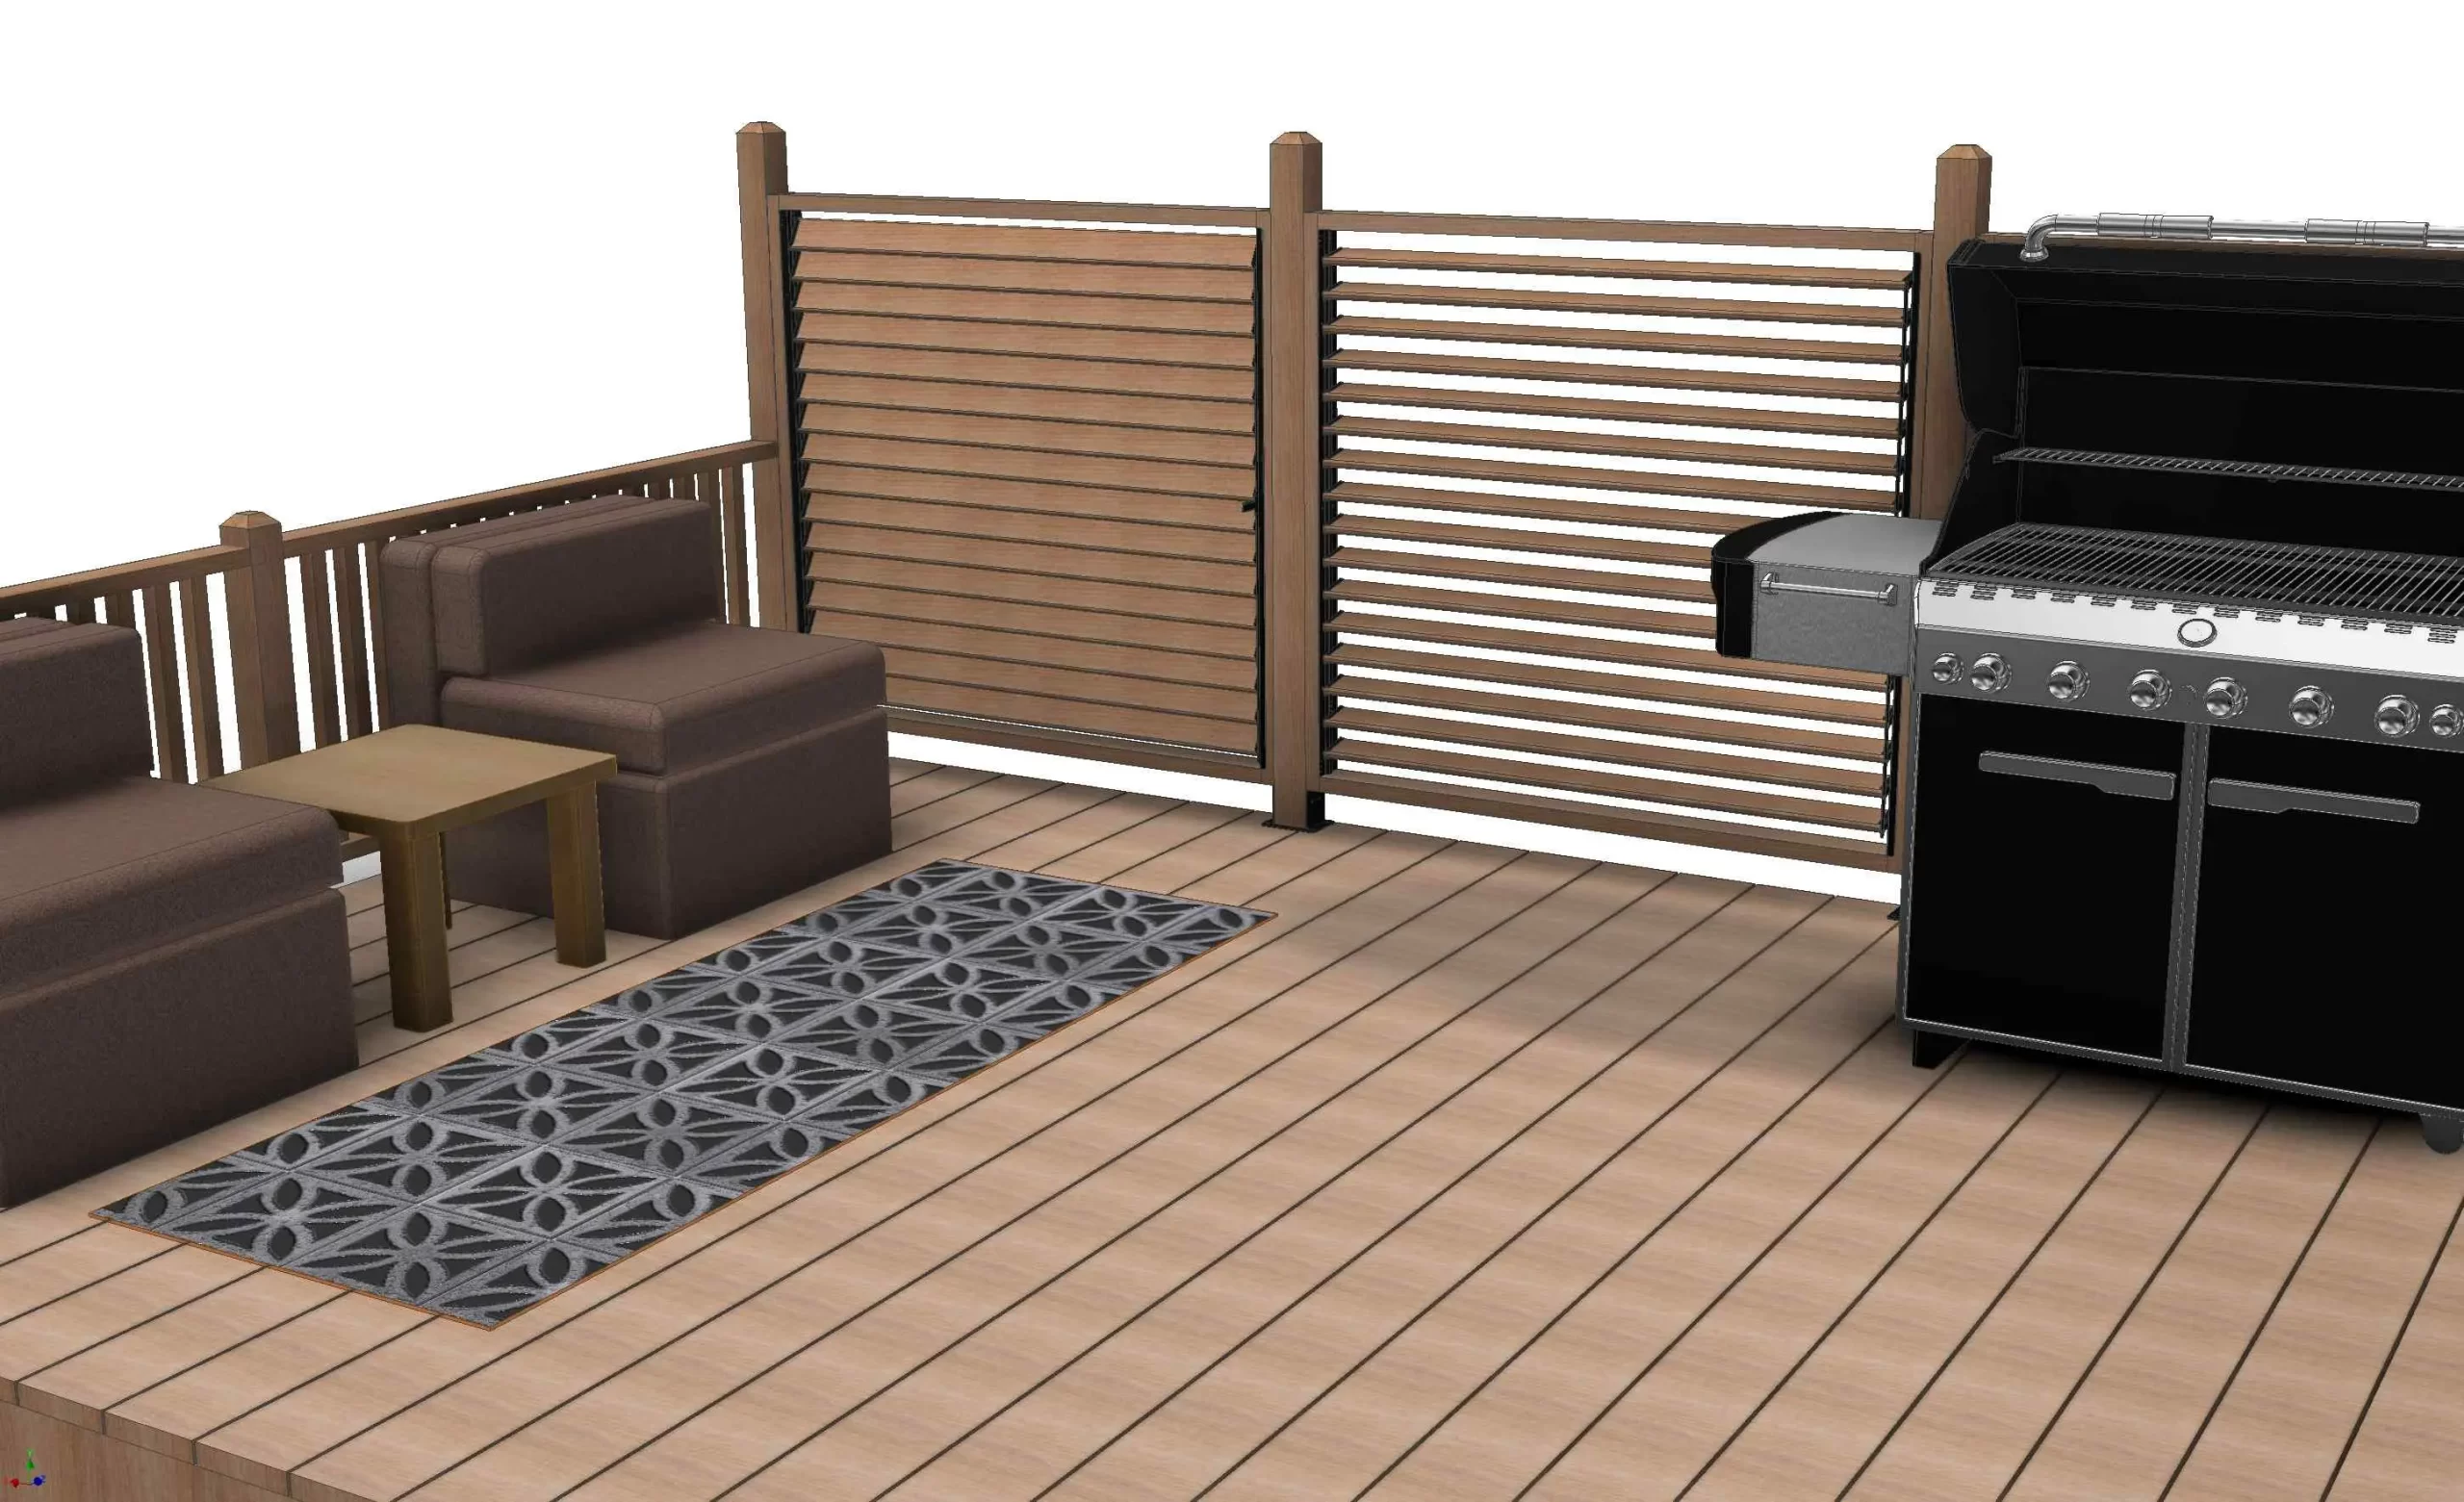
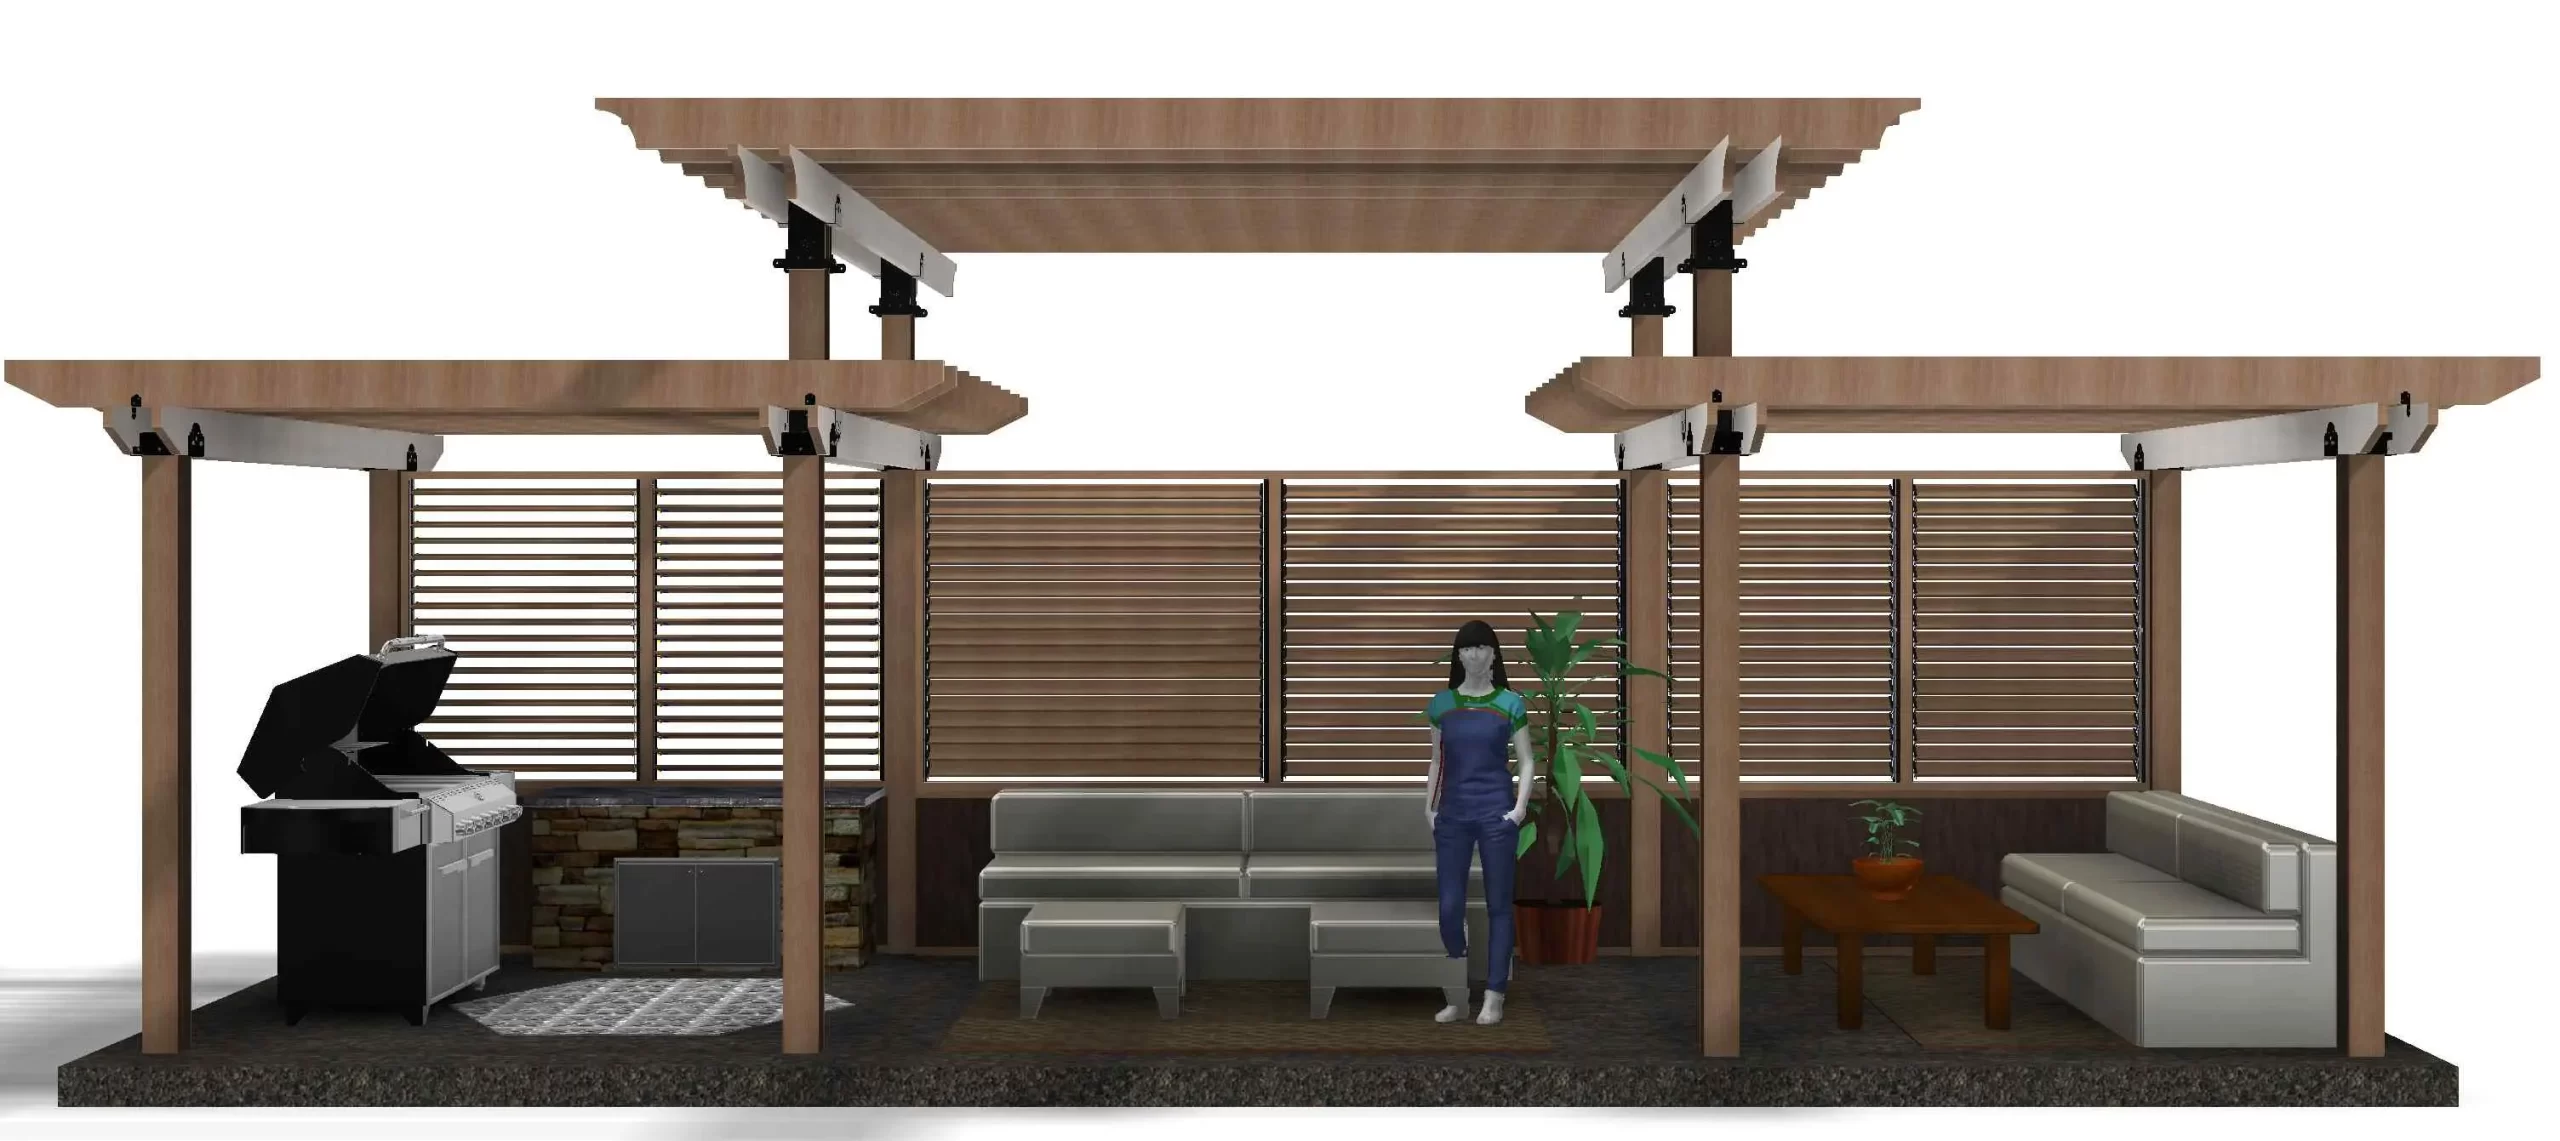
These louvers can be mounted in fixed openings, in sliding barn door style frames, in bifold door frames, and in hinging door frames built with 2×4 or 2×6 PT lumber or Aluminum frames. They can be mounted on walls horizontally or vertically and on ceiling frames as adjustable sun shield.

These louvers provide unlimited application possibilities. Only your creativity limits how you can apply these louvers in your home and surroundings.

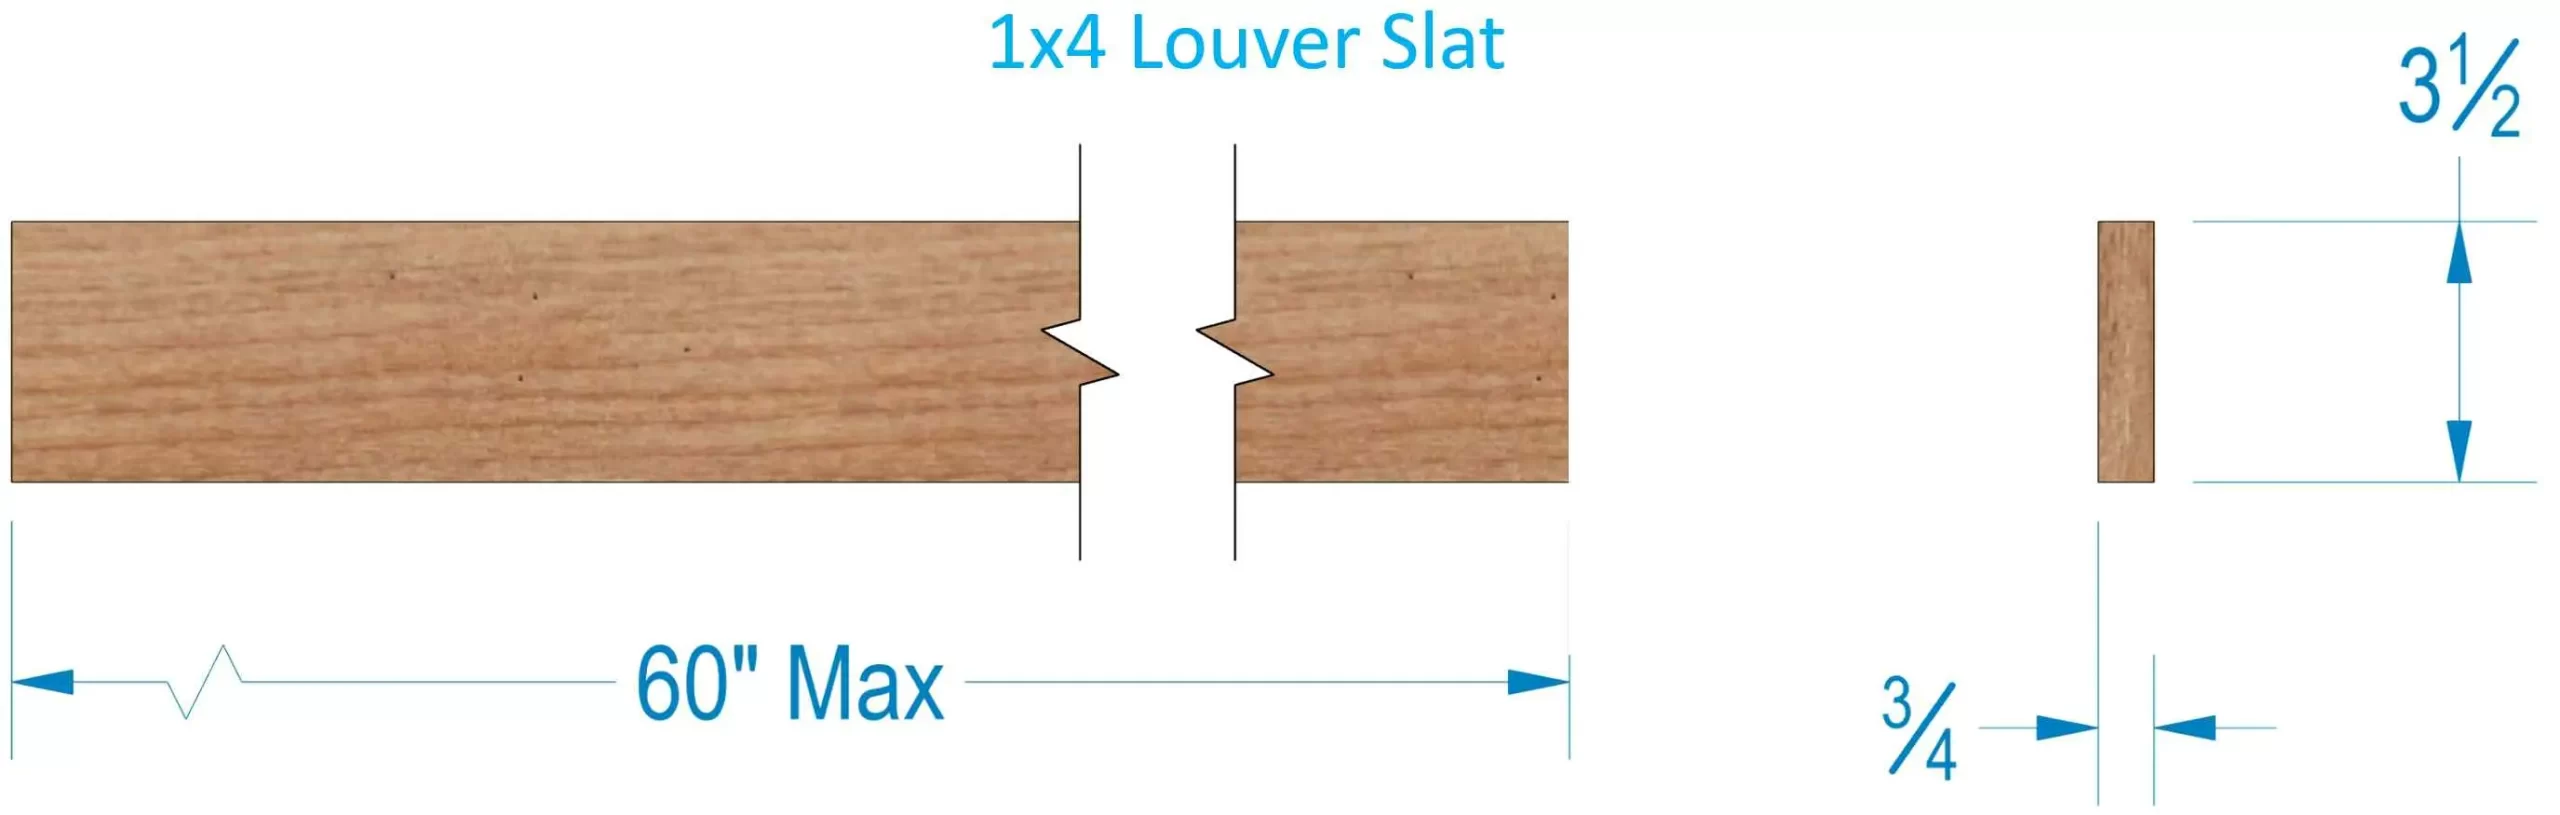
Choose from 24“, 30“, 36“, 48” or any combination to create unlimited sizes.

24" Size

#24RL - 24" DIY LOUVERS

..In Stock Now

24X48 Diy Louver Kits
Explore RL24 - RioOutdoors.com

24" Louver Kit

36" Size
The Decorative 36 DIY Louver Kit features horizontal slats in a light wood frame, partially open to let white light filter through the gaps.
Explore RL36 - RioOutdoors.com

36" Louver Kit

#36RL - 36" DIY LOUVERS

..In Stock Now

48" Size

#48RL - 48" DIY LOUVERS

..In Stock Now

48" DIY Louver Kits
DIY Louvers: Enhance Your Living Space - RioOutdoors.com

48" Louver Kit

Shopping Cart
Scroll to Top

List of Recommended Tools

Measuring Tape

A tape measure in good condition is required to accurately measure lengths of lumber members and framed openings.

 Miter Saw

A miter saw is recommended for making straight cuts as required a the louver slats’ ends. Do not use a circular saw to make louver slats’ end cuts. A miter saw provides accurate straight cuts when compared to a common circular saw.

Drill Gun

A drill gun (electric drill) is required to predrill pilot holes in the louver slats and to drive screws, as needed.

Framing Level

A framing level is recommended to check plumb and level of framed openings.

1/16″ Drill Bit

A 1/16″ pilot hole is required before driving the #6 screws in dry wood slats. The pilot hole will prevent the wood slats from cracking.

#2 Phillips Screwdriver

A #2 Phillips Screwdriver is required to drive #6 Phil Hd screws to secure louver slats to the louver U-clips.

DIY Louver Kits Sizes

RioOutdoors.com stocks Louver Bracket Kits in three unique sizes:

  1. 24″ ….Kit #24RL
  2. 36″ ….Kit #36RL
  3. 48″ ….Kit #48RL

The actual dimensions of each bracket kit and the opening size requirements are provided in the table, below:

Note: On mobile devices, scroll the table to the left to view additional details.


Required Opening Dimensions

Required Materials


AS HORIZONTAL LOUVERS

AS VERTICAL LOUVERS

Included in Kit

Customer Supplied

Louver Kit SKU#

Side Bracket Length (in.)

HEIGHT

WIDTH

HEIGHT

WIDTH

# Wood Screws

# of 1X4 Wood Slats

24-RL

23 7/8

24″

60″ MAX

60″ MAX

24″

28

7

36-RL

35 7/8

36″

60″ MAX

60″ MAX

36″

44

11

48-RL

47 7/8

48″

60″ MAX

60″ MAX

48″

60

15

Additional Sizes Capability

Additional taller or longer openings can be filled by stacking one Louver Kit on top of another Louver Kit. The video, below, shows you how to stack one louver bracket kit on top of another.

The designs of RL24, RL36, and RL48 Louver kits allows stacking one side mount bracket on top of another to create taller or longer louver systems.

The table, below, provides the stacked lengths yielded by stacking different lengths or same length louver kits.


Required Opening Dimensions

   AS HORIZONTAL LOUVERS

AS VERTICAL LOUVERS

Bottom Louver Kit SKU#

Top Louver Kit SKU#Combined Side Bracket Length (in.)HEIGHTWIDTHHEIGHTWIDTH

RL24

RL2445-3/445-7/8″60″ MAX60″ MAX45-7/8″
RL36RL2457-15/1658″60″ MAX60″ MAX

58″

RL36

RL3670-3/1670-1/4″60″ MAX60″ MAX70-1/4″

RL48

RL2470-3/1670-1/4″60″ MAX60″ MAX

70-1/4″

RL48

RL3682-7/1682-1/2″60″ MAX60″ MAX82-1/2″
RL48RL4894-11/1694-3/4″60″ MAX60″ MAX

94-3/4″

Louver Slats Material Types

The louver bracket kits are designed to use dimensional 1×4 lumber measuring 3/4″ x 3-1/2″.

There are many varieties of wood slats available in dimensional 1×4 size.

The types of wood you can use are limited only by their availability in the required dimensional 1×4 size.

The wood you select is determined by cosmetic requirements, durability requirements, and your budget.

Research online to discover the wood slat options available.

The types of wood available in the market which you can consider using are:

  • Softwood
    Birch, Cedar, Fir, Pine, Redwood
  • Hardwood
    Alder, Balsa, Beech, Hickory, IPE, Mahogany, Maple, Oak, Teak, Tigerwood, Walnut, and others.

Composite Wood Slats are NOT recommended
Composite wood slats are NOT recommended because they are too flexible  in the length direction. This flexible characteristic causes sagging and bowing which is not desirable.

Louvers Slat Sizes

The DIY Louver Bracket kits are designed to use dimensional 1×4, actual 3/4″ x 3-1/2″ lumber members.

A maximum length of 60 inches is recommended for each louver slat.

Louver Slats Orientation

Horizontal Orientation

The most common applications will employ the horizontal orientation, meaning that the louver slats are mounted horizontally, the slat length runs left to right, and the slats rotate up and down.

Vertical Orientation

Depending on the functionality desired, the louver slats may be oriented vertically. In the vertical orientation, the louver slat length runs up and down and the louver slats rotate left to right. Vertically orienting the louver slats will allow wind flow direction control, horizontally. 

Louvers Configurations

Fixed Frame Mounting

Mounting on a fixed frame in square or rectangle openings in walls and ceilings, or over windows is possible.

Window Storm Shutters

Vertical Wall Mounting

This louver kit can be mounted on any fixed vertcial framed square or rectangle opening. In this configuration, the louver slats can be oriented horizontally or vertically.

Ceiling Mounting

This louver kit can be mounted in ceilings between rafters or in a framed opening to act as sunshades and partial rain shields. Although these louvers will stop rainfall from directly entering the living space when closed, the gaps between the 1×4 slats, the gaps between the U-clips, and the main brackets will allow water to drip into the living space.

Sunlight Control

Hinging Frame Mounting

This louver kit can be mounted to a door-type or window-type hinged frame. This will allow you to open and close the frame like a window or a door.

Sliding Frame Mounting

This louver kit can be mounted to a door-type or window-type sliding frame. Sliding mechanisms can be of any type available in the market. Commonly available types are:
1. Bypass Door Type
2. Pocket Sliding Door Type
3. Sliding Bi-Fold Door Type

4. Patio Sliding Door Type
5. Accordion Door Type
6. Barn Door Type

Barn Door Style

DIY LOUVERS: APPLICATION & BENEFITS 

  1. Sunlight Control
    When installed on walls or ceilings, the louvers can be used to control sunlight flow into any space.
  2. Privacy Control
    The louvers can be employed to control privacy. Install over widows, hottub sides, pool sides, pergola walls, or anywhere part time privacy is desired.
  3. Wind Control
    The louvers can be employed to stop wind flow and wind flow direction. Especially useful if a deck or outdoor living space is constantly exposed to wind.
  4. Storm Shielding
    For areas of the country where high velocity windstorms are prevalent, installing these louvers as hinging or sliding storm shutters over windows and closing the louvers during storms can help prevent damage to the window glass and structure by flying stones and other debris.

DIY LOUVERS GALLERY